


To create a signature footer in RoundCube follow these steps:
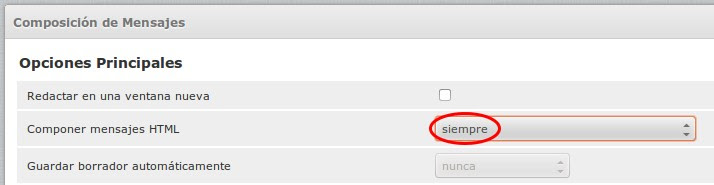
1.- Activate signature: The first step to configure the signature in RoundCube is to access "Settings", "Preferences" and "Message Composition". Here we find the option "Write messages in HTML" where we select "always", in this way, whenever an email is written, the signature and the linked image will be shown.
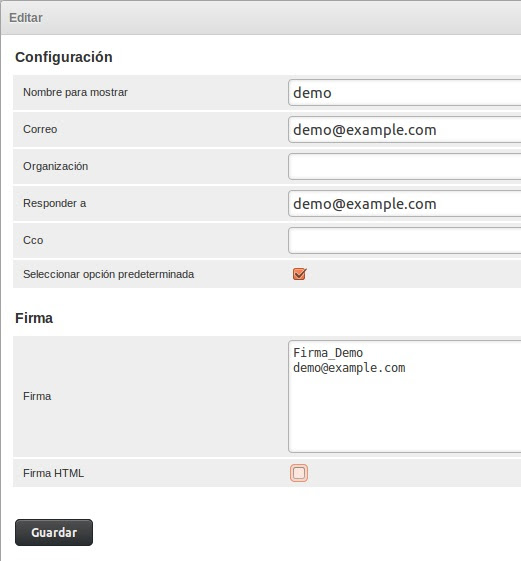
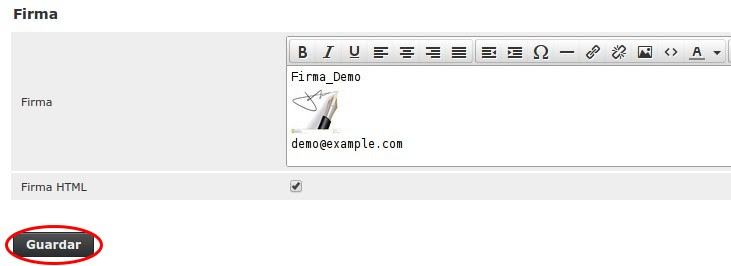
2.- Access the identities section: Within RoundCube, we access "Settings", "Identities" and select the identity that appears to modify it. We can establish the name to show, the mail to answer, the signature and other characteristics. To personalize the signature of the emails, we write in the box "Signature" the desired text, as we see in the following image.
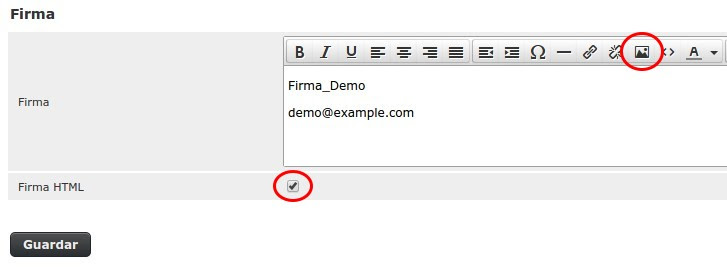
3.- Insert image: RoundCube offers us the possibility of attaching images for the signature in a very easy way, always with a maximum size of 64 KB per image and without the need to enter HTML code. If more than one signature is created, the sum of the size of the images can not exceed 64 KB. To add a logo or image to our signature, we must check the box "Signature in HTML" and click on the icon "insert / edit image" that is shown in the following image.
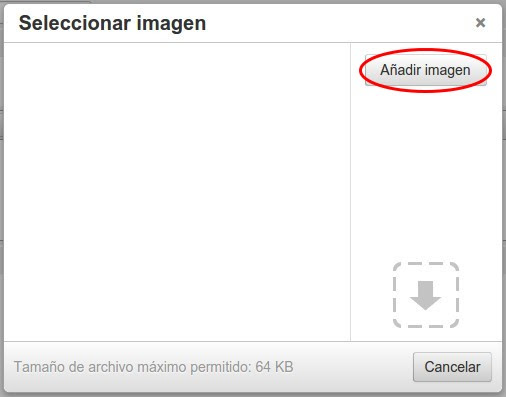
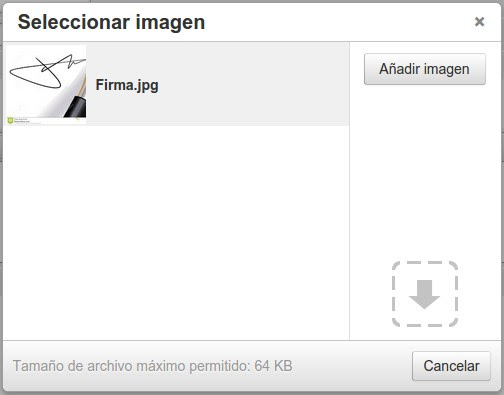
4.- Then we use the "Add an image" button to open the box to attach the images.
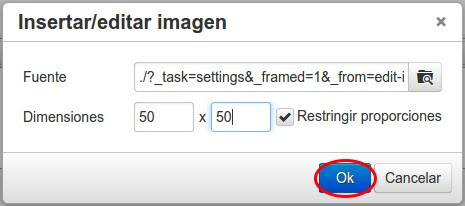
5.- In the section "Source" we indicate the local address where the image is located and just below we specify the size that we want for the image.
6.- Finally, the list of available images is shown, to choose one or another we click directly on the image.
7.- Once selected in the previous section, it will be inserted in the signature. We can move or modify the size easily by selecting the image and dragging one of the corners. To finish the configuration, select "Save" to save the changes.
Congratulations! You now have inserted a signature for your emails.
 Español