


Email Service
-
Accessing Roundcube Webmail on Mobile Devices: Tips for Seamless Integration
Step 1: Check Device Compatibility: Before getting started, ensure that your mobile device is compatible with Roundcube Webmail. Most modern smartphones and tablets should be able to access Roundcube Webmail without any issues.
Step 2: Enable IMAP/POP3 Access:
- Log in to your Roundcube Webmail account using a web browser on your computer.
- Go to the settings or preferences section and enable IMAP or POP3 access.
- Save the changes. This step is essential for accessing your Roundcube Webmail account on mobile devices.
Step 3: Configure Email Client on Mobile Device:
- On your mobile device, open the email client application (e.g., Mail on iOS or Gmail on Android).
- Tap on "Add Account" or "Add Email Account" and select "Other" or "Manual Setup."
- Enter your email address and password, then choose IMAP or POP3 as the account type.
- Input the incoming and outgoing mail server settings. You can find these settings in the Roundcube Webmail account settings.
- Complete the setup process and wait for your email account to be verified.
Step 4: Adjust Sync Settings: To optimize performance and conserve battery life, adjust the sync settings of your email client. Choose how often your device checks for new emails and how much historical data to sync.
Step 5: Enable Notifications: To stay informed about new emails, enable notifications for your Roundcube Webmail account on your mobile device. This ensures that you receive timely alerts whenever a new email arrives.
Step 6: Test and Troubleshoot:
- Once the setup is complete, send a test email to your Roundcube Webmail account and check if it appears on your mobile device.
- If you encounter any issues, double-check the email settings on your mobile device and ensure that IMAP/POP3 access is enabled in Roundcube Webmail settings.
Step 7: Explore Mobile-Friendly Features: Roundcube Webmail offers a mobile-friendly interface optimized for smaller screens. Explore features like swipe gestures, threaded conversations, and easy attachment handling to enhance your mobile email experience.
-
Add my email account to Outlook 365 using IMAP
Synchronize your email account (
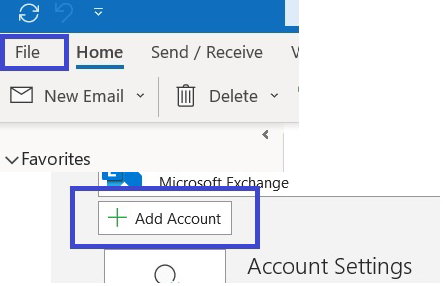
This email address is being protected from spambots. You need JavaScript enabled to view it. ) with Outlook. The following steps are the same whether you're adding your first email or an additional email:1. We start off by clicking on File > Add Account.
2. In Outlook 365 you will see the following page, we add our email account (
This email address is being protected from spambots. You need JavaScript enabled to view it. ) and then click on Advanced Options > Let me set up my account manually > Connect.
3. We now choose the option IMAP.

4. A new window will pop up. Configure your email with the following configuration:
Incoming Mail
Server: mail.mydomain.com (replace mydomain.com with your domain name)
Port: 993
Encryption Method: SSL/TLS
Check the option that says Require logon using Secure Password Authentication (SPA).Outgoing Mail
Server: mail.mydomain.com (replace mydomain.com with your domain name)
Port: 465
Encryption Method: SSL/TLS
Check the option that says Require logon using Secure Password Authentication (SPA).
5. Once finished filling everything out, click on Next.
6. Congrats! Outlook 365 will now sync with your email address.
If you have any questions or are experiencing problems, please contact support at
This email address is being protected from spambots. You need JavaScript enabled to view it. , or you can also start a live chat in your account.
-
Collaborative Email Management: Using Roundcube Webmail's Shared Folders Feature
Step 1: Access Roundcube Webmail:
- Log in to your cPanel account and open Roundcube Webmail from the email section.
Step 2: Understanding Shared Folders:
- Shared Folders in Roundcube Webmail allow you to share specific email folders, such as Inbox, Sent, Drafts, or custom folders, with other users.
Step 3: Creating a Shared Folder:
- Click on the "Settings" option in the top-right corner of the Roundcube Webmail interface.
- Select "Folders" from the dropdown menu.
- Click on the "Create new folder" button.
- Enter a name for the new folder and check the box next to "Share folder."
- Choose the users or groups you want to share the folder with from the list of available users.
- Click "Create" to create the shared folder.
Step 4: Accessing Shared Folders:
- Once a shared folder is created, users who have been granted access can view it in their Roundcube Webmail account.
- Shared folders will appear in the folder list alongside your personal folders.
Step 5: Managing Shared Folders:
- Users with access to a shared folder can perform various actions, including viewing, creating, editing, and deleting emails within the folder.
- Changes made to a shared folder, such as moving or deleting emails, will be visible to all users who have access to the folder.
Step 6: Removing Access to a Shared Folder:
- If you no longer want to share a folder with certain users, you can remove their access.
- Navigate to the folder settings as described in Step 3.
- Find the shared folder you want to modify and click on it.
- Uncheck the box next to the users or groups from whom you want to remove access.
- Click "Save" to apply the changes.
Step 7: Collaboration Best Practices:
- Communicate with your team members about shared folders to ensure everyone understands their purpose and usage guidelines.
- Use descriptive folder names and organize emails within shared folders logically to facilitate efficient collaboration.
- Regularly review and manage permissions for shared folders to ensure access is appropriate and up-to-date.
Step 8: Review and Adjust:
- Periodically review shared folders and their contents to ensure they remain relevant and organized.
- Adjust folder permissions and access as team members join or leave projects or responsibilities change.
Step 9: Troubleshooting:
- If you encounter any issues with shared folders, such as access problems or syncing errors, consult Roundcube Webmail's documentation or contact your email administrator for assistance.
Step 10: Training and Support:
- Provide training and support to team members on how to use shared folders effectively for collaborative email management.
- Encourage feedback from users to identify any areas for improvement or additional features needed for successful collaboration.
-
Composing and Sending Emails in Roundcube Webmail: A Beginner's Guide
-
Accessing Roundcube Webmail:
- Log in to your cPanel account using your credentials provided by your hosting provider.
- Navigate to the "Email" section and click on "Email Accounts."
- Find your email account and click on "Access Webmail" next to it to open Roundcube Webmail.
-
Composing a New Email:
- Once logged in to Roundcube Webmail, click on the "Compose" button located in the top-left corner of the interface.
- A new email composition window will open, allowing you to draft your email.
-
Entering Recipient Details:
- In the "To" field, enter the email address of the recipient.
- Optionally, you can also enter email addresses in the "CC" (carbon copy) and "BCC" (blind carbon copy) fields for additional recipients.
-
Adding Subject and Message:
- Enter a descriptive subject for your email in the "Subject" field.
- Type your message in the large text box provided. You can format your text using the formatting options available.
-
Attaching Files (if needed):
- If you want to attach files to your email, click on the paperclip icon to attach files from your computer.
- Select the file(s) you want to attach and click "Open" to add them to your email.
-
Previewing and Sending Email:
- Before sending your email, you can preview it by clicking on the "Preview" button to ensure everything looks correct.
- Once you're satisfied with your email, click on the "Send" button to send it to the recipient(s).
-
Managing Sent Emails:
- Roundcube Webmail automatically saves a copy of sent emails in the "Sent" folder.
- You can access your sent emails by clicking on the "Sent" folder in the left panel of the Roundcube interface.
-
Logging Out:
- After composing and sending your emails, don't forget to log out of Roundcube Webmail for security purposes.
- Click on the "Logout" button located in the top-right corner of the interface to log out of your email account.
-
-
Configuring Autoresponders and Vacation Messages in Roundcube Webmail
Step 1: Access Roundcube Webmail:
- Log in to your Roundcube Webmail account using your credentials.
Step 2: Navigate to Settings:
- Once logged in, locate and click on the "Settings" option in the top-right corner of the interface.
Step 3: Configure Autoresponder:
- In the Settings menu, select the "Filters" tab.
- Click on the "New Filter" button to create a new filter.
- Enter a name for your autoresponder filter, such as "Out of Office" or "Vacation Reply."
- Under the "Conditions" section, specify when the autoresponder should trigger. For instance, you can set it to activate for all incoming emails or only those received during specific dates.
- In the "Actions" section, choose "Reply with Message" from the dropdown menu.
- Enter the subject and body of the autoresponse message. You can customize this message to inform senders about your absence and provide alternative contact information if necessary.
- Save the filter to activate the autoresponder.
Step 4: Test the Autoresponder:
- Send a test email to your Roundcube Webmail account from another email address.
- Check if you receive the autoresponse confirming that the autoresponder is functioning correctly.
Step 5: Disable or Delete Autoresponder:
- Once you return from your absence, it's essential to disable or delete the autoresponder filter to stop sending automatic replies.
- Navigate back to the Filters tab in Settings, find the autoresponder filter, and disable or delete it as needed.
Step 6: Additional Tips:
- Keep your autoresponder message concise and informative, providing essential details without overwhelming the sender.
- Consider including the dates of your absence in the autoresponse message to manage sender expectations effectively.
- Regularly check your email while using an autoresponder to ensure you don't miss any urgent messages requiring immediate attention.
-
Customizing Roundcube Webmail Settings to Suit Your Preferences
Step 1: Access Roundcube Webmail:
- Log in to your cPanel account using your credentials.
- Navigate to the "Email" section and select "Email Accounts."
- Locate your email account and click on "Access Webmail" to open Roundcube Webmail.
Step 2: Accessing Settings:
- Once logged in, find the settings icon (usually a gear or cogwheel) in the interface's top-right corner and click on it.
- From the dropdown menu, select "Settings."
Step 3: Exploring General Settings:
- In the "Settings" menu, start with the "General" tab.
- Adjust basic settings such as language preferences, date format, and time zone to your liking.
Step 4: Personalizing Interface:
- Navigate to the "Interface" tab to customize the appearance and layout.
- Choose your preferred theme, adjust message list density, and configure interface-related settings.
Step 5: Managing Email Display:
- Go to the "Displaying Messages" tab to control how emails are shown in your inbox.
- Adjust settings like the number of messages per page, message preview options, and conversation view settings.
Step 6: Setting Up Signatures:
- Head to the "Identities" tab to manage email identities and signatures.
- Create or edit signatures that will be automatically added to outgoing emails.
Step 7: Configuring Security Options:
- Explore the "Security" tab to configure security-related settings.
- Set up options such as encryption, session security, and password management for enhanced email security.
Step 8: Managing Server Settings:
- Visit the "Server Settings" tab to configure server-related settings.
- Adjust IMAP, SMTP, and folder subscription settings according to your needs.
Step 9: Saving Changes:
- After making adjustments in each tab, remember to save your changes.
- Look for the "Save" or "Apply" button at the bottom of each tab to save your settings.
Step 10: Reviewing and Updating:
- Periodically review your settings to ensure they still meet your needs.
- Update settings as necessary to adapt to changes in your email usage patterns.
Step 11: Logging Out:
- Once you've customized your settings, log out of Roundcube Webmail for security.
- Click the "Logout" button in the top-right corner of the interface to log out.
-
Enhancing Email Security in Roundcube Webmail: Tips and Tricks
Step 1: Enable Two-Factor Authentication (2FA):
- Two-factor authentication adds an extra layer of security to your account by requiring a second form of verification, such as a code sent to your mobile device.
- Access your account settings in Roundcube Webmail and enable 2FA if supported by your email provider.
Step 2: Use Strong Passwords:
- Ensure your email account password is strong and unique, comprising a mix of letters, numbers, and special characters.
- Avoid using easily guessable passwords or reusing passwords across multiple accounts.
Step 3: Keep Software Updated:
- Regularly update Roundcube Webmail and any associated software to patch security vulnerabilities.
- Enable automatic updates where possible to ensure you are always using the latest, most secure version.
Step 4: Enable SSL/TLS Encryption:
- Secure Socket Layer (SSL) or Transport Layer Security (TLS) encryption encrypts the data transmitted between your device and the email server, preventing interception by third parties.
- Ensure SSL/TLS encryption is enabled in your email settings.
Step 5: Beware of Phishing Attempts:
- Be cautious of emails requesting sensitive information or containing suspicious links or attachments.
- Avoid clicking on links or downloading attachments from unknown or untrusted sources.
Step 6: Verify Sender Identity:
- Before responding to an email or providing sensitive information, verify the sender's identity to ensure it is legitimate.
- Look for signs of phishing, such as misspelled email addresses or requests for urgent action.
Step 7: Use Email Filtering and Spam Protection:
- Enable email filtering and spam protection features provided by Roundcube Webmail to automatically detect and block unsolicited or malicious emails.
- Regularly review and adjust filtering rules to improve accuracy and reduce false positives.
Step 8: Secure Access to Devices:
- Ensure devices used to access Roundcube Webmail are protected with strong passwords or biometric authentication.
- Enable screen locks and device encryption to prevent unauthorized access to email accounts.
Step 9: Educate Users on Security Best Practices:
- Provide training and awareness programs to educate users on common email security threats and best practices.
- Encourage users to report suspicious emails or security incidents promptly.
Step 10: Regularly Backup Emails:
- Regularly backup your emails to ensure you have a copy in case of accidental deletion or data loss due to security breaches.
- Use secure, encrypted backup solutions to protect sensitive email data.
Step 11: Monitor Account Activity:
- Periodically review account activity logs provided by Roundcube Webmail to detect any unauthorized access or suspicious behavior.
- Report any unusual activity to your email provider and take appropriate action to secure your account.
-
Exploring Advanced Features of Roundcube Webmail in cPanel
Step 1: Access Roundcube Webmail in cPanel:
- Log in to your cPanel account using your credentials.
- Navigate to the "Email" section and click on "Email Accounts."
- Select "Access Webmail" next to the email account you wish to utilize, then opt for "Roundcube" as your preferred webmail client.
Step 2: Explore Advanced Features:
a) Inbox Organization:
- Utilize folders and labels to categorize your emails based on topics or priorities.
- Experiment with the search function to quickly locate specific emails.
b) Filter Management:
- Set up filters to automatically sort incoming emails into designated folders.
- Customize filters based on sender, subject, or keywords to efficiently organize your inbox.
c) Autoresponders:
- Configure autoresponders to send automatic replies to incoming emails.
- Personalize autoresponder messages and set durations for their activation.
d) Calendar and Task Integration:
- Explore the integration of Roundcube Webmail with external calendar applications.
- Utilize task management features to create to-do lists and keep track of important tasks.
Step 3: Experiment and Customize:
- Take time to explore each feature and understand how it integrates into your email management workflow.
- Customize settings and preferences according to your needs and preferences.
-
How to Access Your Email and Change Your Password in Roundcube – SiteWorx
To change your email password, you must first log in to your webmail. Follow these steps:
-
Log in to webmail
Open your browser and go to your domain followed by /webmail.
Example:mydomain.com/webmail
On this page, enter your email address and current password.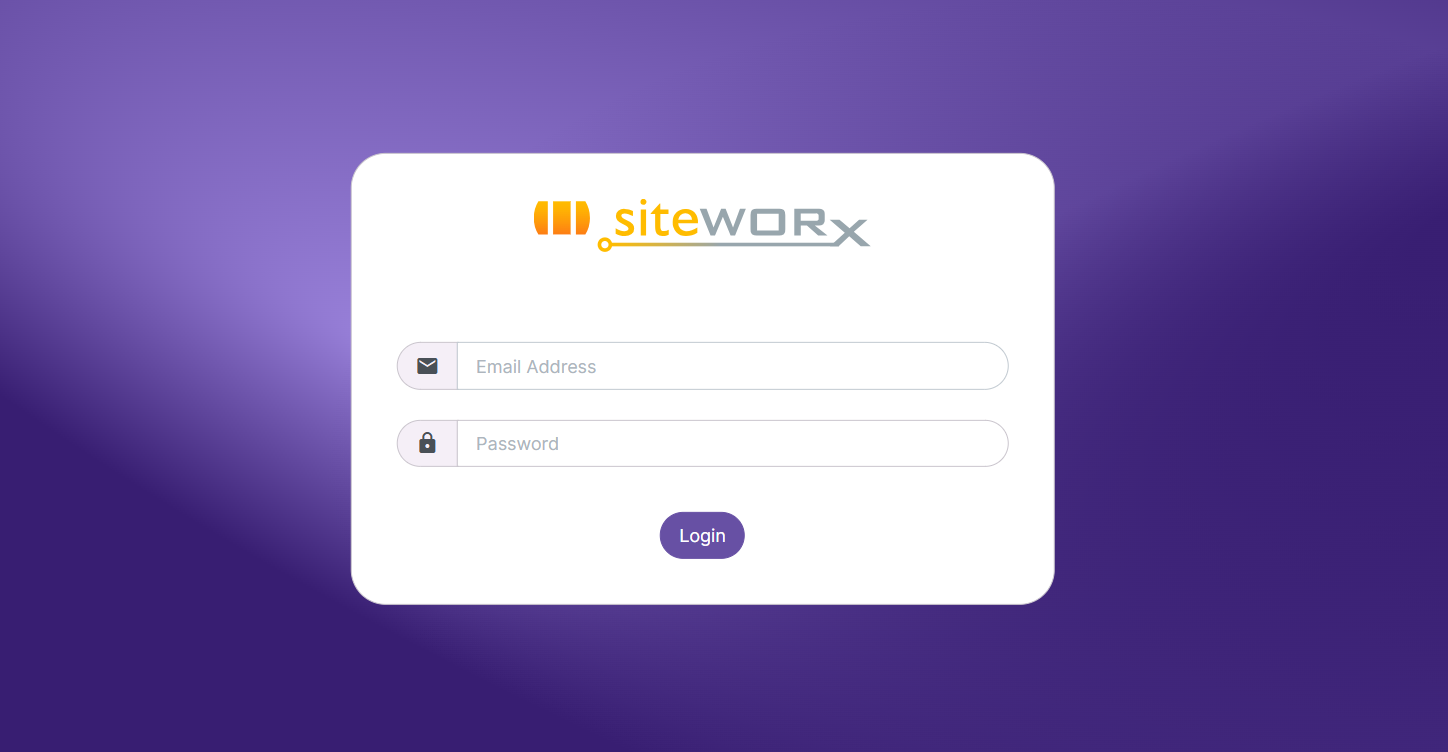
-
Go to Settings
Once inside your email, navigate to the left-hand menu and click on Settings → Password.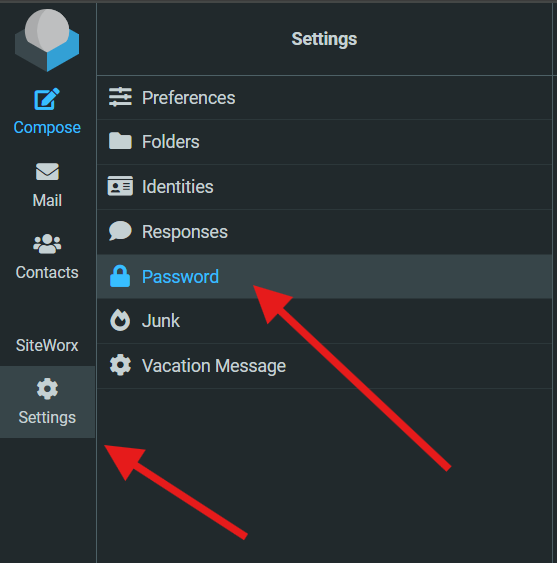
-
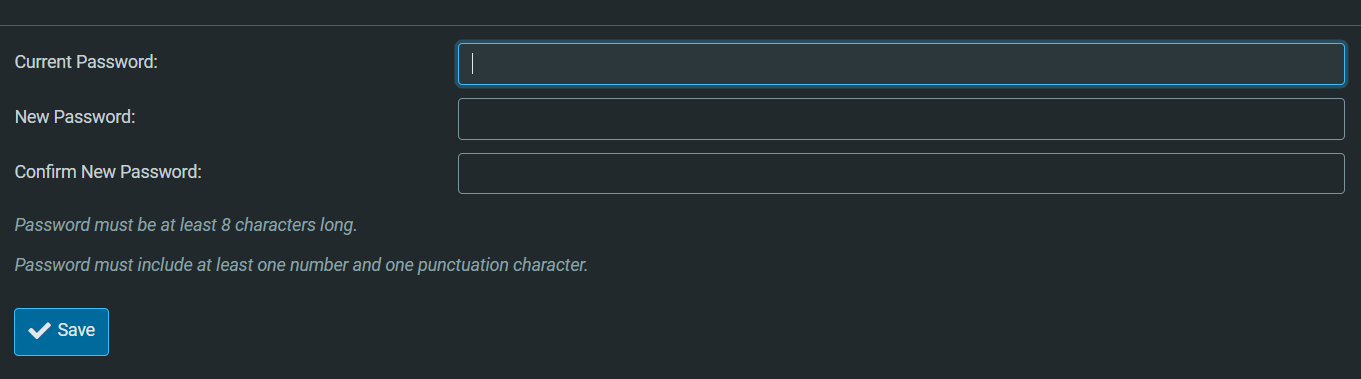
Change your password
On the Password page:-
Enter your current password.
-
Enter your new password in the next two fields.
🔒 Your new password must be at least 8 characters long, and include one number and one punctuation character.
-
-
Save the changes
Click Save. Your new password will now be updated successfully.
-
Return to your inbox
To continue checking your emails, go to the left-hand menu and click Mail. There you will find your Inbox and folders where you can organize your messages.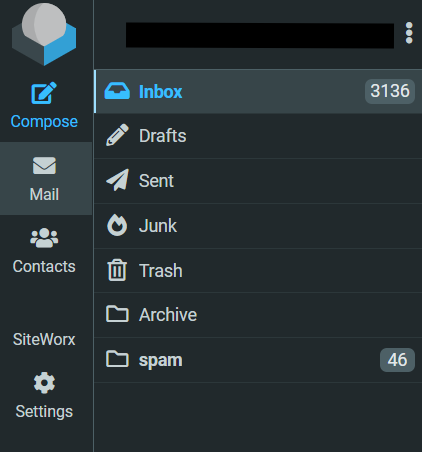
💡 Need help?
If you have any questions or run into issues, please contact our support team atThis email address is being protected from spambots. You need JavaScript enabled to view it. . -
-
How to add a Text/Image signature in Horde Webmail
To add a signature in Horde Webmail follow the steps below:
1.- Log in to Webmail (yourdomain.com/webmail) and choose the Horde option.
2.- Click on the Gear Icon and select Preferences -> Mail:

3.- Click on Personal Information:

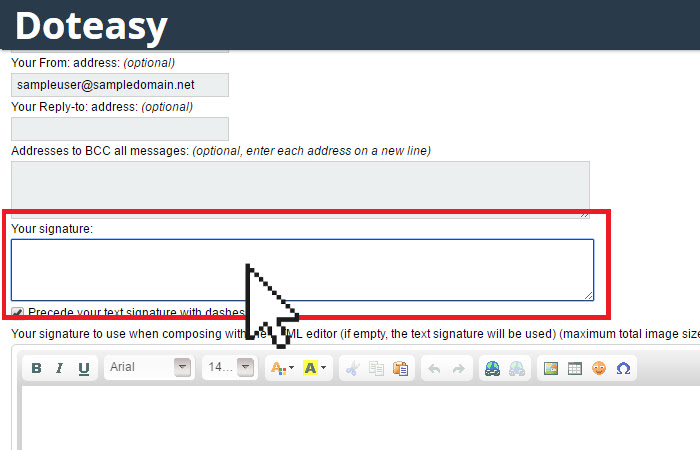
4.- Scroll to the Signature section and add your signature in the Your signature box:
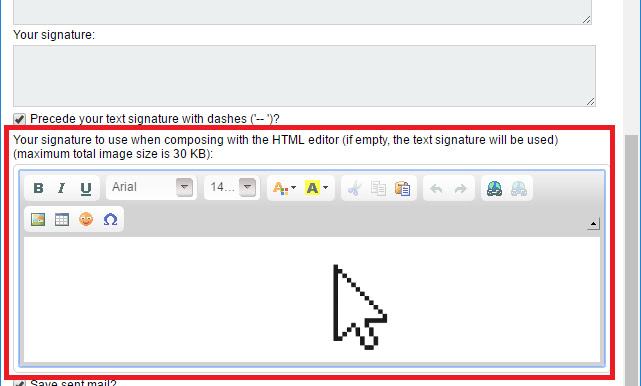
5.- If you want to use HTML in your signature, use the HTML editor. If you leave the HTML editor blank, then the text signature will be used:
6.- When ready, click Save at the bottom of the page.
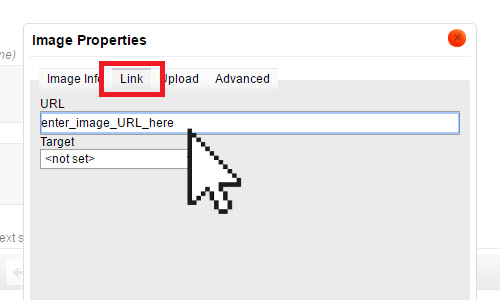
Note: Any image that you use in the signature must be accessible through the Internet or it will not work. The safest way is to add the image by it’s URL. You have to add the URL in Link and in Image Info.

You have now created your new email signature. The email signature will automatically appear when you compose an email your Horde webmail interface.
Note: If you also use a local mail client or a mobile device to send email messages, you will also need to add your signature in these applications as well.
-
How to add a Text/Image signature in Roundcube Webmail
To create a signature footer in RoundCube follow these steps:
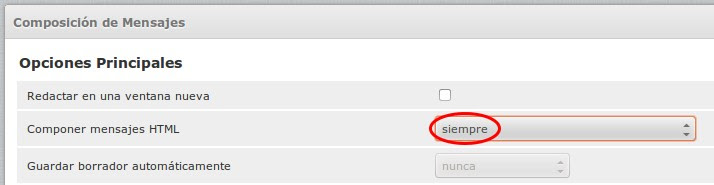
1.- Activate signature: The first step to configure the signature in RoundCube is to access "Settings", "Preferences" and "Message Composition". Here we find the option "Write messages in HTML" where we select "always", in this way, whenever an email is written, the signature and the linked image will be shown.
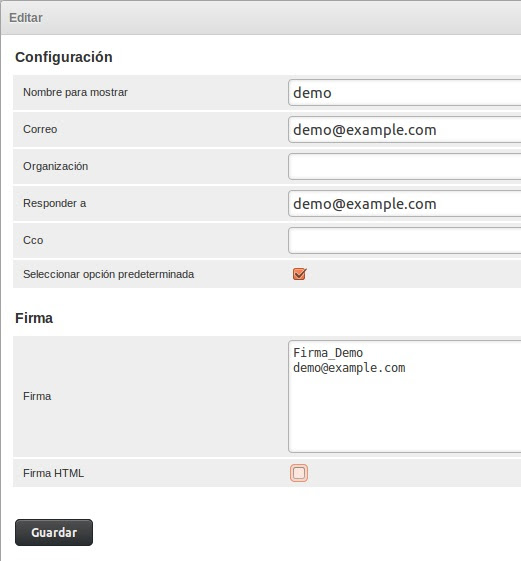
2.- Access the identities section: Within RoundCube, we access "Settings", "Identities" and select the identity that appears to modify it. We can establish the name to show, the mail to answer, the signature and other characteristics. To personalize the signature of the emails, we write in the box "Signature" the desired text, as we see in the following image.
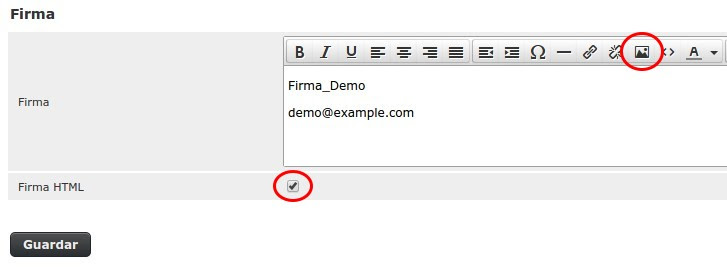
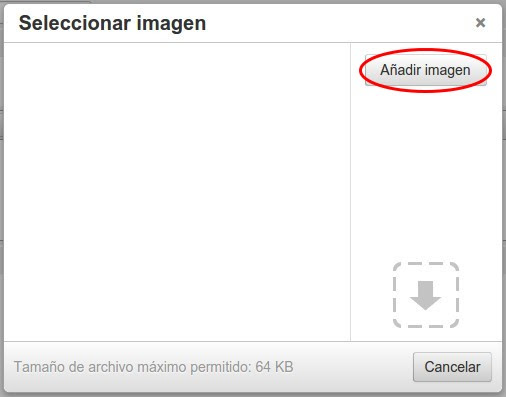
3.- Insert image: RoundCube offers us the possibility of attaching images for the signature in a very easy way, always with a maximum size of 64 KB per image and without the need to enter HTML code. If more than one signature is created, the sum of the size of the images can not exceed 64 KB. To add a logo or image to our signature, we must check the box "Signature in HTML" and click on the icon "insert / edit image" that is shown in the following image.
4.- Then we use the "Add an image" button to open the box to attach the images.
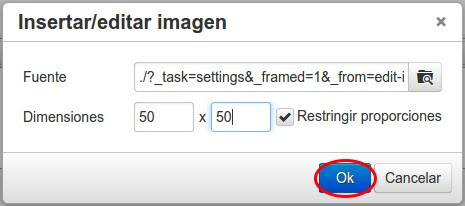
5.- In the section "Source" we indicate the local address where the image is located and just below we specify the size that we want for the image.
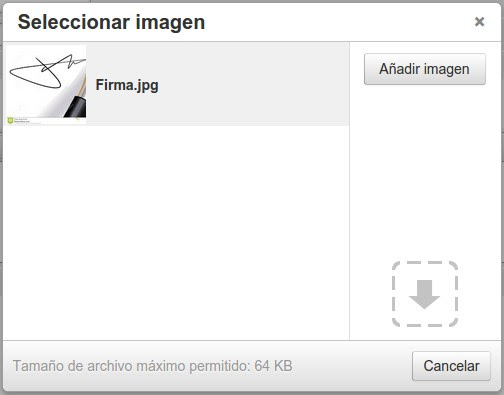
6.- Finally, the list of available images is shown, to choose one or another we click directly on the image.
7.- Once selected in the previous section, it will be inserted in the signature. We can move or modify the size easily by selecting the image and dragging one of the corners. To finish the configuration, select "Save" to save the changes.
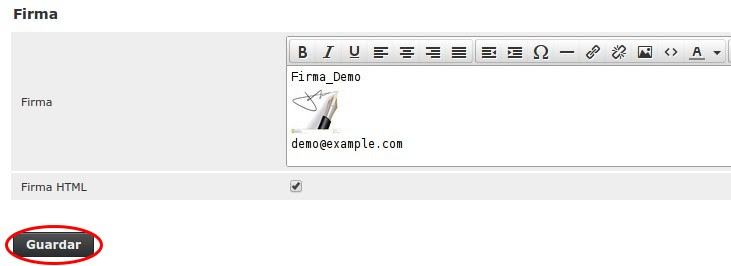
Congratulations! You now have inserted a signature for your emails.
-
How to change your e-mail password on Webmail
To change your email password follow these steps:
-
Enter to your domain name followed by /webmail (example: mydomain.com/webmail) and it will ask for your username and password, in the username field enter your e-email.

-
-
How to configure your email on Android
To configure your email on your Android device, follow these steps:
1.- On your phone, go to Settings -> Accounts -> Add an account -> Personal (IMAP):

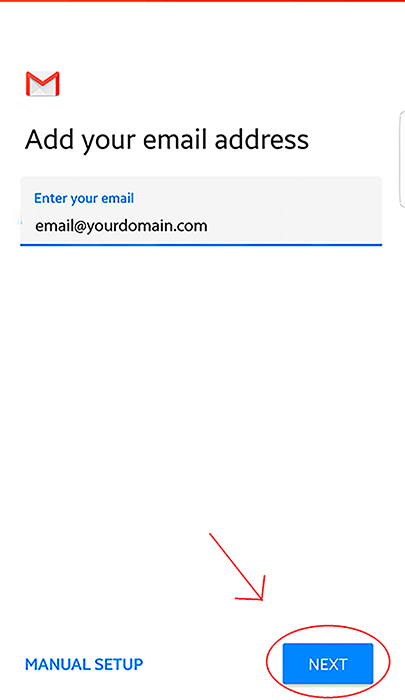
2.- Once you have clicked on Personal (IMAP), this window will appear, enter your email and click on next:
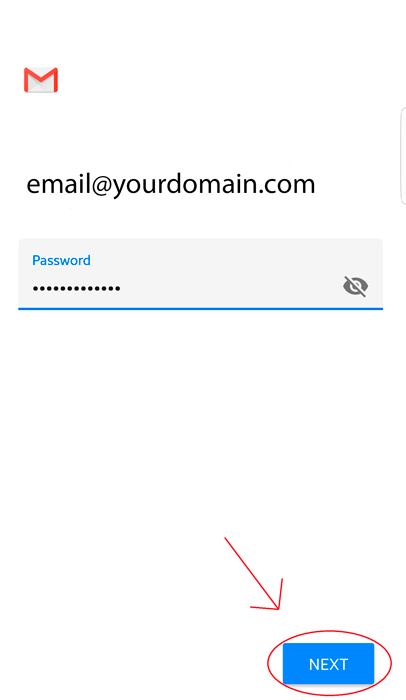
3.- Once you have clicked next, you will be taken to this window, enter the password of your email and click next:
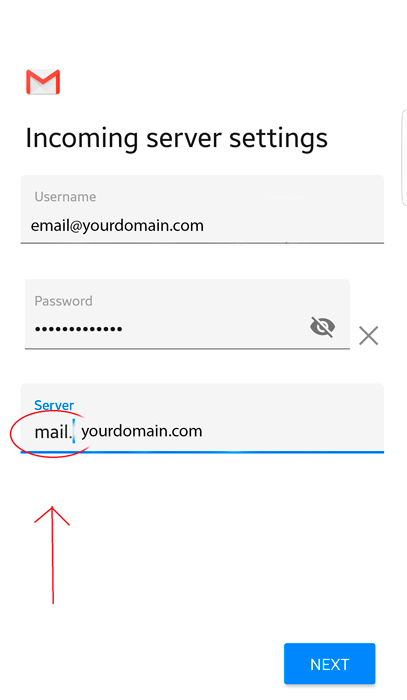
4.- This window will appear, be sure to enter "mail." before yourdomain.com as seen in the image below, and then click on next:
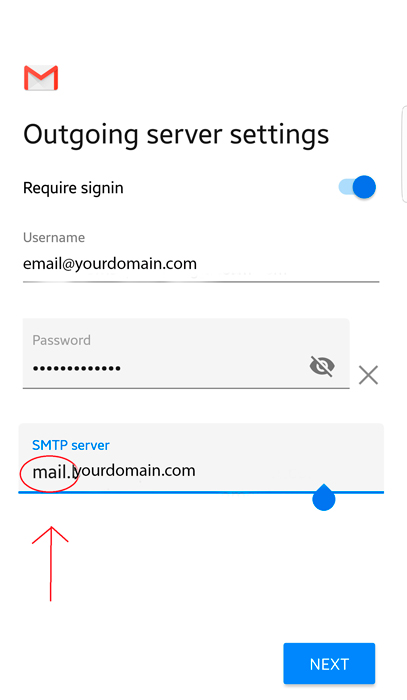
5.- Another window will appear, in this case you must do the same as in the previous step, entering "mail." before yourdomain.com, then click on next:
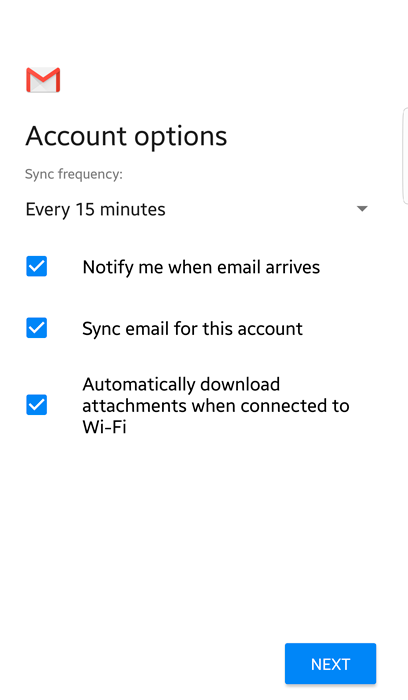
6.- Now you will see this window, we recommend leaving everything marked so that the email is always synchronized:
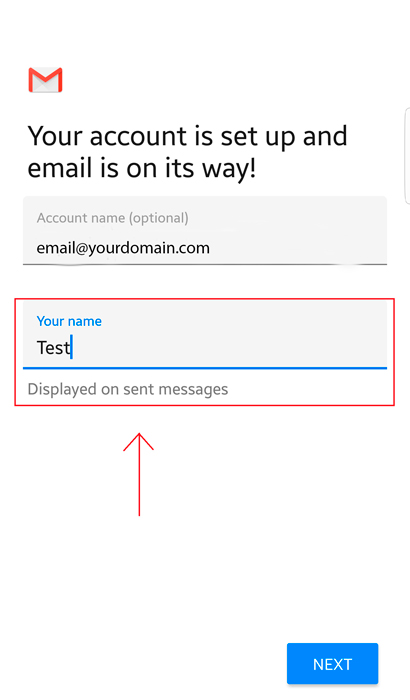
7.- Now you can choose the name you want to appear in the emails sent, once you have done that, click next:
8.- Congratulations! You have just finished configuring your email. To be able to see your emails, look for this icon among all your applications:
-
How to create an email in cPanel?
To create a new email under your domain name, follow these steps:
1. Log in to your account at cyberglobalnet.com/login
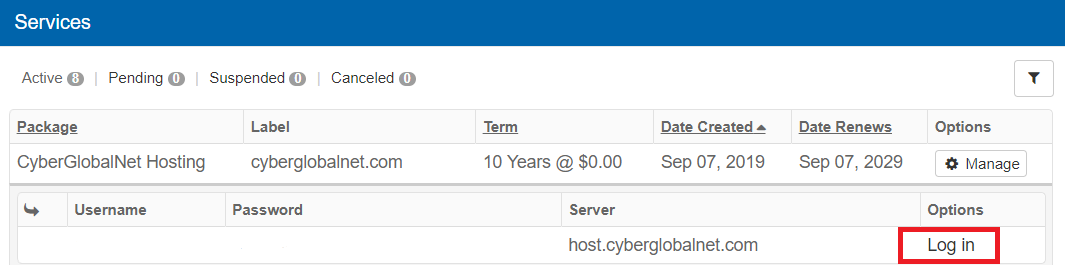
2. Once you have logged in, click on the Web Hosting Service you want to create your new email and then click on Log In:
3. A new window will open where you will see your Control Panel (cPanel), in the search box write Email accounts and click on it:
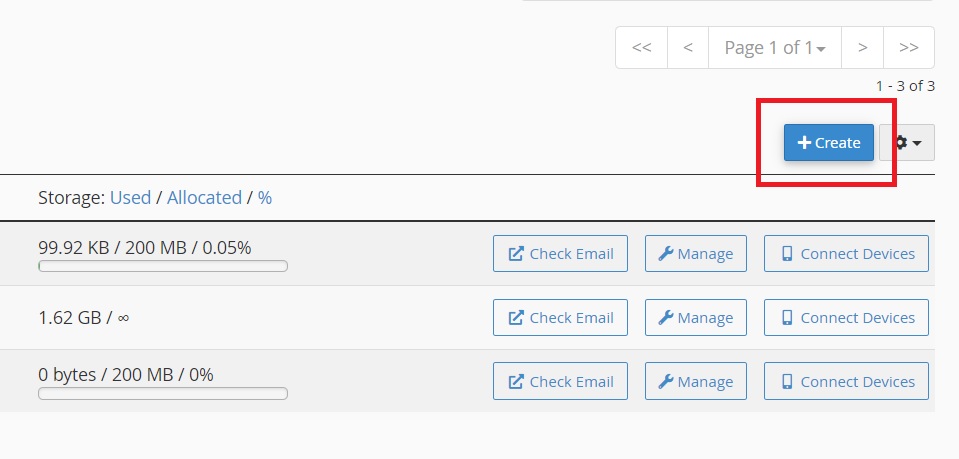
4. From here, you are able to see all your email accounts. To create a new one, click on Create:
5. In Domain you can choose the domain you want to create the new email account under.
In Username, choose the email address. It can be contact, info, your name, or anything you'd like.
In Password, you can set your new password or send a login link to an alternate email address.
In Optional Settings, you can choose the storage space.
Once it is all done, click on Create.6. Done! Your new email address has been created. You can now access your email using webmail.mydomainname.com, replacing "mydomainname.com" with your own domain name.
-
How to increase the space on my webmail account?
In this tutorial we will teach you how to increase space to your Webmail email.
1.- We first access our account in CyberGlobalNet.
2.- We click on our Web Hosting Service and then click on Log In:

3.- A new windows will open where you will see your Control Panel (cPanel), in the search box we write "Email accounts" and we click on it:

4.- Now we click in "Manage" on the desired email and where it says "Storage (Allocated Storage Space) we increase the space:

If you have difficulties, you can write to
This email address is being protected from spambots. You need JavaScript enabled to view it. .
-
How to set up an IMAP email account on an Apple device
To set up an IMAP email account on your Apple device, follow these steps:
- Open the Settings app.
- Tap Mail.
- Tap Accounts.
- Tap Add Account.
- Tap Other.
- Tap Add Mail Account.
- Enter your name, email address (example:
This email address is being protected from spambots. You need JavaScript enabled to view it. ), password, and a description for your account. - Tap Next.
- Mail will try to find the email settings for your account and finish your account setup. If Mail finds your email settings, tap Done to complete your account setup.
- If Mail can't find your email settings, you will need to enter them manually. To do this, tap Incoming Mail Server and enter the following information:
- Host Name: Enter the incoming mail server address such as mail.mydomain.com, replace mydomain.com with your own domain name.
- Port: 993
- User Name: Enter your email address.
- Password: Enter the password for your email account.
- Use SSL: Select Yes.
- Tap Outgoing Mail Server and enter the following information:
- Host Name: Enter the outgoing mail server address such as mail.mydomain.com, replace mydomain.com with your own domain name.
- Port: 465
- User Name: Enter your email address.
- Password: Enter the password for your email account.
- Use SSL: Select Yes.
- Tap Next
- Mail will verify your account settings and finish setting up your account.
Once your account is set up, you can start sending and receiving emails.
For any additional questions, or assistance, please contact our support team at
This email address is being protected from spambots. You need JavaScript enabled to view it.
-
Importing and Exporting Contacts in Roundcube Webmail: A Step-by-Step Guide
Step 1: Access Roundcube Webmail:
- Log in to your Roundcube Webmail account using your credentials.
Step 2: Navigate to Contacts:
- Once logged in, find and click on the "Contacts" tab or option in the Roundcube Webmail interface.
Step 3: Import Contacts:
- Look for the "Import" or "Import Contacts" option within the Contacts section.
- Choose the file format from which you want to import contacts (e.g., CSV, vCard).
- Click on the "Browse" or "Choose File" button to select the contact file from your computer.
- After selecting the file, click on the "Import" or "Upload" button to initiate the import process.
- Follow any on-screen prompts to confirm and complete the import of your contacts.
Step 4: Export Contacts:
- Locate the "Export" or "Export Contacts" option within the Contacts section.
- Choose the file format in which you want to export your contacts (e.g., CSV, vCard).
- Select the contacts you want to export, or choose to export all contacts.
- Click on the "Export" or "Download" button to begin downloading the exported contacts file.
- Save the downloaded file to your desired location on your computer.
Step 5: Verify Import and Export:
- After importing or exporting contacts, verify the process was successful by checking your contact list.
- Ensure that all contacts were imported correctly and that the exported file contains the desired contacts.
Step 6: Additional Tips:
- Before importing contacts, ensure that the contact file is correctly formatted according to the chosen file format (e.g., CSV, vCard).
- Regularly export your contacts as a backup to prevent data loss in case of accidental deletion or system failure.
- When exporting contacts, consider encrypting the exported file or storing it in a secure location to protect sensitive information.
-
Integrating External Email Accounts with Roundcube Webmail in cPanel
Step 1: Access Roundcube Webmail:
- Log in to your cPanel account using your credentials.
- Navigate to the Email section and select Roundcube Webmail.
Step 2: Access Email Settings:
- Once logged in to Roundcube Webmail, locate and click on the "Settings" option in the top-right corner of the interface.
Step 3: Add External Email Account:
- In the Settings menu, select the "Identities" tab.
- Click on the "Add Identity" button to add a new email account.
Step 4: Enter Account Details:
- Enter the display name you want to appear when sending emails from this account.
- Input the email address of your external account.
- Optionally, you can configure a signature for outgoing emails.
Step 5: Configure Server Settings:
- Under the "Server Settings" section, enter the incoming and outgoing server details for your external email account.
- Specify the type of encryption (SSL/TLS) and port numbers for both incoming (IMAP or POP3) and outgoing (SMTP) servers.
Step 6: Save Settings:
- After entering all the required information, click on the "Save" or "OK" button to save the settings.
Step 7: Verify Account Integration:
- Once the account settings are saved, Roundcube Webmail will attempt to connect to your external email account using the provided details.
- If the connection is successful, you will see a confirmation message, and your external email account will be integrated with Roundcube Webmail.
Step 8: Access Integrated Email Account:
- You can now access your integrated external email account alongside your other email accounts within Roundcube Webmail.
- Switch between accounts by selecting the dropdown menu next to your email address and choosing the desired account.
Step 9: Manage Integrated Email Account:
- You can perform various actions on your integrated external email account, including composing, receiving, and managing emails.
- Use the folders panel to navigate between different folders, such as Inbox, Sent, Drafts, etc., for your external account.
Step 10: Troubleshooting:
- If you encounter any issues during the integration process, double-check the server settings and ensure they are correct.
- Verify that your external email provider supports IMAP or POP3 access and that the necessary ports are open.
- If you're still experiencing issues, contact your email provider's support for assistance.
-
Managing Email Folders and Labels in Roundcube Webmail
-
Accessing Roundcube Webmail:
- Log in to your cPanel account using your credentials provided by your hosting provider.
- Navigate to the "Email" section and click on "Email Accounts."
- Find your email account and click on "Access Webmail" next to it to open Roundcube Webmail.
-
Creating New Folders:
- Once logged in to Roundcube Webmail, locate the left panel where your folder list is displayed.
- Right-click on the "Folders" section and select "Create" from the dropdown menu.
- Enter a name for your new folder and press "Enter" to create it.
-
Renaming and Deleting Folders:
- To rename a folder, right-click on the folder name and select "Rename."
- Enter the new name for the folder and press "Enter" to save the changes.
- To delete a folder, right-click on the folder name and select "Delete."
- Confirm the deletion when prompted.
-
Moving Emails to Folders:
- To move emails to a specific folder, select the email(s) you want to move by checking the checkboxes next to them.
- Right-click on the selected email(s) and choose "Move to" from the dropdown menu.
- Select the destination folder where you want to move the emails and click "Move."
-
Creating and Applying Labels:
- Roundcube Webmail allows you to create and apply labels to emails for better organization.
- Select the email(s) you want to label by checking the checkboxes next to them.
- Right-click on the selected email(s) and choose "Label as" from the dropdown menu.
- Enter the label name and press "Enter" to create the label.
- The labeled emails will be displayed with the label name for easy identification.
-
Filtering Emails by Folders and Labels:
- Use the folder list on the left panel to navigate to different folders and view emails stored in each folder.
- To filter emails by labels, click on the "Filters" option above the email list and select the desired label from the dropdown menu.
-
Managing Folders and Labels Settings:
- Roundcube Webmail also allows you to customize folder and label settings.
- Right-click on the "Folders" section and select "Settings" to access folder settings.
- From here, you can configure settings such as folder subscriptions and auto-refresh intervals.
-
Logging Out:
- Once you've finished managing your email folders and labels, remember to log out of Roundcube Webmail for security purposes.
- Click on the "Logout" button located in the top-right corner of the interface to log out of your email account.
-
-
Managing Email Signatures in Roundcube Webmail: Personalization Tips
Step 1: Access Roundcube Webmail:
- Log in to your Roundcube Webmail account using your credentials.
Step 2: Navigate to Settings:
- Once logged in, locate and click on the "Settings" option in the top-right corner of the interface.
Step 3: Access Identities:
- In the Settings menu, find and click on the "Identities" tab or option.
Step 4: Create a New Identity:
- Click on the "New Identity" or "Add Identity" button to create a new email identity.
- Enter your name and email address in the respective fields.
- Customize additional details such as organization, reply-to address, and signature.
Step 5: Customize Email Signature:
- Scroll down to the Signature section within the Identity settings.
- Enter your desired email signature in the text field. You can include your name, job title, contact information, website link, and any other relevant details.
- Use formatting options such as bold, italics, and font colors to enhance your signature's appearance.
Step 6: Save Changes:
- Once you've customized your email signature, scroll to the bottom of the page and click on the "Save" or "Apply" button to save your changes.
Step 7: Test Your Signature:
- Compose a new email or reply to an existing one to test your email signature.
- Ensure that the signature appears correctly and contains all the necessary information.
Personalization Tips:
- Keep it concise: Limit your email signature to essential information to avoid overwhelming recipients.
- Include contact details: Provide recipients with multiple ways to contact you, such as phone numbers and social media profiles.
- Add a professional touch: Consider incorporating your company logo or a professional headshot to personalize your signature.
- Use consistent formatting: Maintain a consistent font style and size throughout your signature for a polished look.
- Update regularly: Update your email signature as needed, especially if your contact information or job title changes.
-
Navigating the New Roundcube Webmail Interface in cPanel
-
Accessing Roundcube Webmail:
- Log in to cPanel using your login credentials provided by your hosting provider.
- Scroll down to the "Email" section and click on "Email" or "Email (Roundcube)."
-
Exploring the User Interface:
- Once in the Roundcube interface, you'll see a clean and organized layout with various key sections.
- In the left panel, you'll find the inbox, mail folders, and filter options.
- The central panel displays emails from the selected folder, while the right panel may show details of the selected email or additional tools.
-
Managing Emails:
- To read an email, click on its subject in the email list.
- Use the options at the top of the interface to reply, forward, archive, or delete emails.
- Organize your emails into folders using the drag-and-drop option.
-
Composing New Emails:
- Click on the "New Message" button to compose a new email.
- Fill in the required fields such as recipient, subject, and body of the message.
- Use formatting options to format text and attach files if needed.
-
Setting Preferences:
- Explore the settings and preferences options available in the Roundcube interface.
- Customize settings such as language, timezone, email signature, and filtering rules.
-
Using Advanced Features:
- Roundcube offers various advanced features such as contact management, calendar, and email filtering settings.
- Explore these additional features to maximize your productivity and organization.
-
Secure Logout:
- Once you've finished using Roundcube, ensure to log out securely to protect your privacy and security.
- Click on the "Logout" button at the top right of the interface to sign out of your email account.
-
-
Organizing Your Inbox with Filters and Rules in Roundcube Webmail
-
Accessing Roundcube Webmail:
- Log in to your cPanel account using your credentials provided by your hosting provider.
- Navigate to the "Email" section and click on "Email Accounts."
- Find your email account and click on "Access Webmail" next to it to open Roundcube Webmail.
-
Accessing Filters and Rules:
- Once logged in to Roundcube Webmail, locate the settings icon (gear symbol) in the top-right corner of the interface and click on it.
- From the dropdown menu, select "Filters."
-
Creating a New Filter:
- In the Filters settings, click on the "New Filter" button to create a new filter.
- Give your filter a descriptive name to identify its purpose.
- Specify the conditions that incoming emails must meet to trigger the filter. For example, you can filter emails based on sender, recipient, subject, or keywords.
- Choose the action(s) you want the filter to perform on matching emails. This can include moving emails to specific folders, applying labels, marking as read, or forwarding to another email address.
-
Editing or Deleting Filters:
- To edit an existing filter, click on the filter name to open its settings, make the necessary changes, and save.
- To delete a filter, select the filter you want to remove and click on the "Delete" button.
-
Testing and Applying Filters:
- After creating or modifying filters, it's essential to test them to ensure they work as expected.
- Send a test email that meets the filter conditions to verify that the filter triggers the desired actions.
- Once satisfied, apply the filters to your inbox to start automatically organizing incoming emails.
-
Managing Filter Order:
- Roundcube Webmail allows you to set the order of filters to determine the sequence in which they are applied.
- Arrange filters by priority, with the most specific or important filters placed higher in the list.
-
Regular Review and Adjustment:
- Periodically review your filters to ensure they remain relevant and effective.
- Adjust filter settings as needed to accommodate changes in your email communication patterns or organizational preferences.
-
Logging Out:
- After configuring filters and rules, remember to log out of Roundcube Webmail for security purposes.
- Click on the "Logout" button located in the top-right corner of the interface to log out of your email account.
-
-
Roundcube Webmail Add-ons and Plugins: Expanding Functionality in cPanel
Step 1: Access Roundcube Webmail in cPanel:
- Log in to your cPanel account using your credentials.
- Navigate to the "Email" section and click on "Email Accounts."
- Locate the email account you want to manage and click on "Access Webmail."
- Choose Roundcube as your preferred webmail client.
Step 2: Explore Available Add-ons and Plugins:
- Once logged in to Roundcube Webmail, look for the "Settings" icon (usually represented by a gear or cogwheel) and click on it.
- From the dropdown menu, select "Manage Plugins" or a similar option, depending on your Roundcube version.
- Here, you'll find a list of available add-ons and plugins. Take some time to browse through them and identify the ones that might be useful for you.
Step 3: Install Desired Add-ons or Plugins:
- After identifying the add-ons or plugins you want to install, check the box next to each one.
- Once you've selected the desired add-ons or plugins, look for the "Install" or "Enable" button and click on it.
- Follow any on-screen prompts to complete the installation process. You may need to confirm your selection or agree to terms and conditions.
Step 4: Configure Installed Add-ons or Plugins:
- After installation, you may need to configure the settings of the installed add-ons or plugins to tailor them to your preferences.
- Look for options to configure each add-on or plugin within the "Settings" or "Manage Plugins" section of Roundcube Webmail.
- Adjust the settings according to your needs and save any changes made.
Step 5: Explore Enhanced Functionality:
- Once installed and configured, explore the new features and functionalities added by the installed add-ons or plugins.
- These may include improved email management tools, additional security features, enhanced customization options, and more.
Step 6: Update and Manage Add-ons or Plugins:
- Regularly check for updates to your installed add-ons or plugins to ensure they are up to date.
- In the "Manage Plugins" section, you'll often find options to update or remove installed add-ons or plugins.
- If updates are available, follow the prompts to install the latest versions.
Step 7: Troubleshooting and Removal:
- If you encounter any issues with a specific add-on or plugin, try troubleshooting by reviewing the settings or seeking help from the developer's documentation or support resources.
- If you no longer need a particular add-on or plugin, you can easily remove it by accessing the "Manage Plugins" section and selecting the option to uninstall or disable it.
 Español