


Introduction
The FTP (File Transfer Protocol) allows you to transfer files between your computer and your hosting server. By using an FTP client such as FileZilla, you can easily upload, edit, or delete files from your website.
Step 1 – Create an FTP User
-
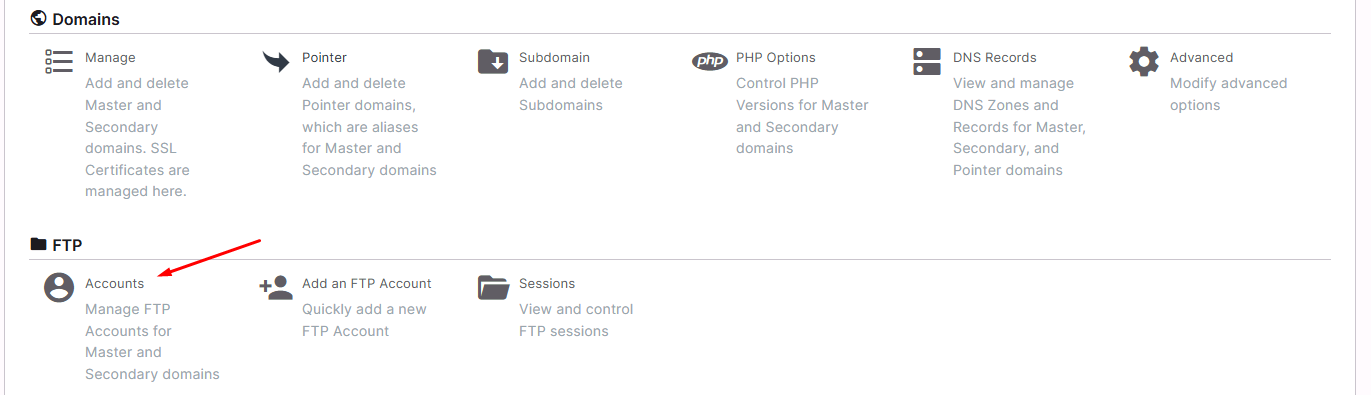
Log in to your SiteWorx control panel.
-
Go to Hosting Features → FTP → Accounts.
-
Click on Add FTP Account.

-
Enter a username, password, and select the folder this account will access (usually
/html).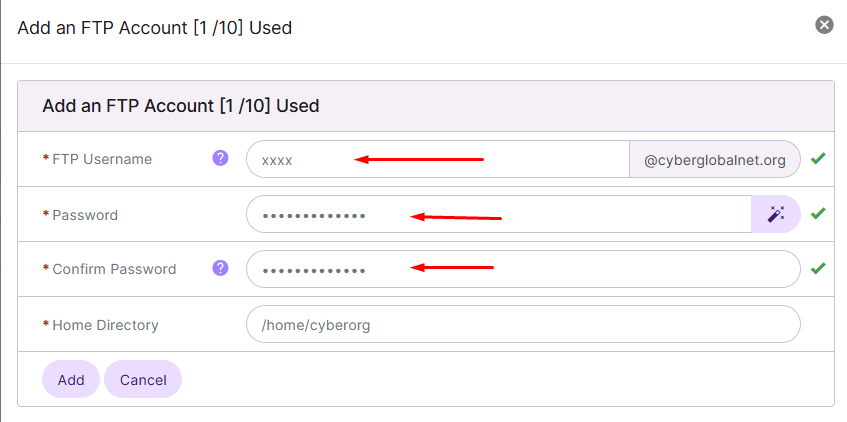
-
Save the changes.
Step 2 – Download and Install FileZilla
-
Visit the official FileZilla website: https://filezilla-project.org
-
Download the FileZilla Client version.
-
Install it on your computer.
Step 3 – Connect to the FTP Server
-
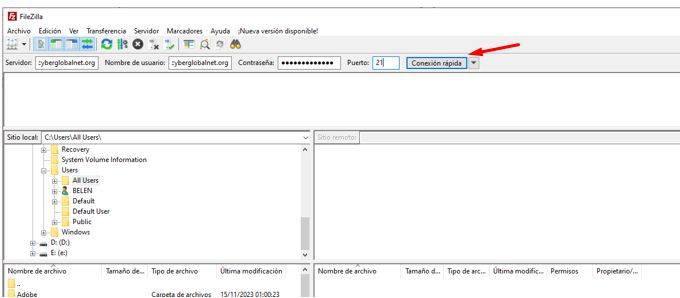
Open FileZilla.
-
At the top fields, enter the following:
-
Host: your domain name or server IP address.
-
Username: the FTP user created in SiteWorx.
-
Password: the password you assigned.
-
Port: 21 (default FTP port).
-
-
Click Quickconnect.
Step 4 – Upload Files to the Server
-
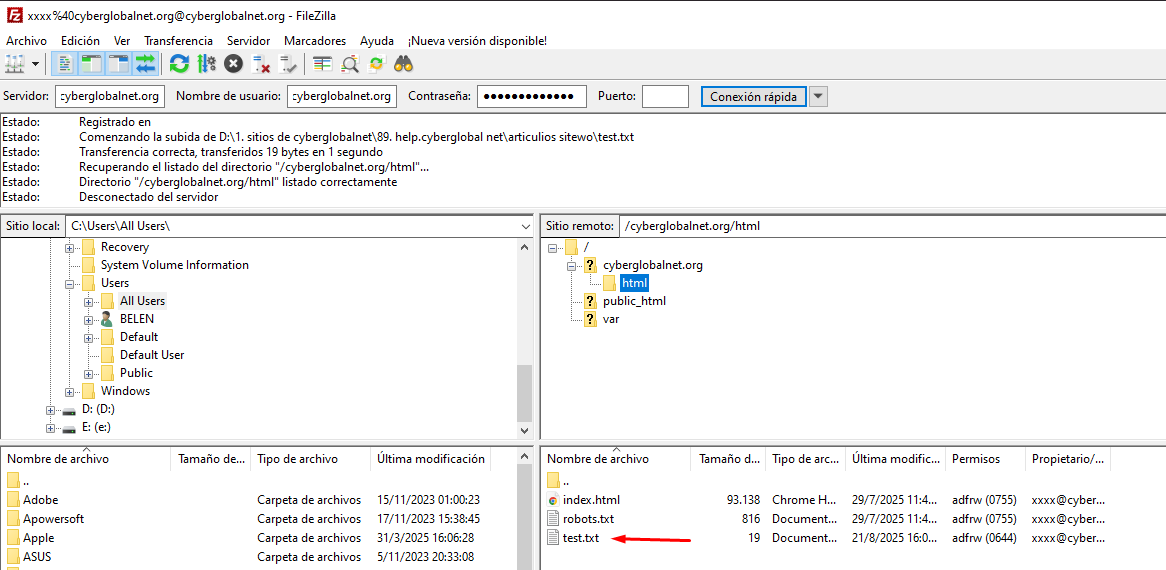
On the left panel of FileZilla, locate the files on your computer.
-
On the right panel, open the /html folder (the public directory of your site).
-
Drag and drop the files from left (local) to right (server).
-
Wait until the transfer is complete.
Step 5 – Verify the Upload
Once the transfer is finished, your files will appear in the selected directory and will be accessible through your domain.
Recommendations
-
Use a secure connection (FTPS or SFTP) if your server supports it.
-
Keep your folders organized (e.g.,
/html/css/,/html/images/). -
Always keep a backup copy before replacing files.
 Español