


Introduction
An SSL certificate allows your website to use HTTPS, ensuring encrypted data transmission. With SiteWorx, you can install a free Let’s Encrypt certificate in just a few steps.
Step 1 – Access Domain Management
Go to SiteWorx → Hosting Features → Domains → Manage.

Step 2 – Select the Domain
In the list of existing domains, click the SSL lock icon for the domain where you want to enable HTTPS.
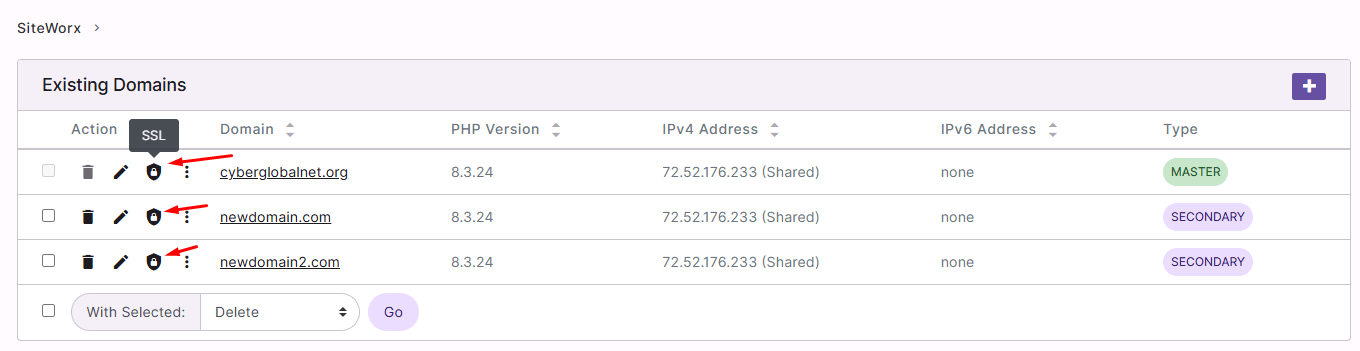
Step 3 – Open Let’s Encrypt
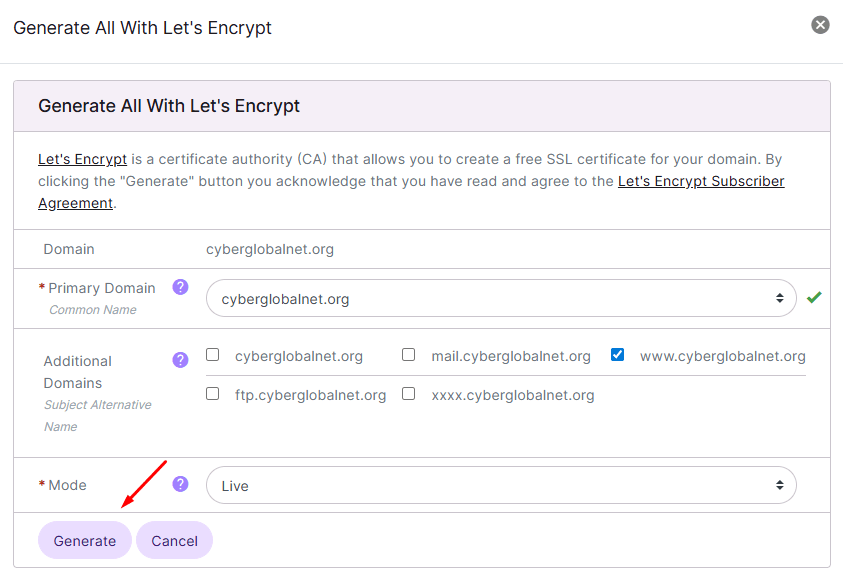
In the SSL section, click the button:
Generate All With Let’s Encrypt

Step 4 – Configure the Certificate
The configuration window will open:
-
Primary Domain: the main domain is selected automatically.
-
Additional Domains: you may include subdomains like www, mail, ftp.
-
Mode: select Live so the certificate is valid in production.
Click Generate.
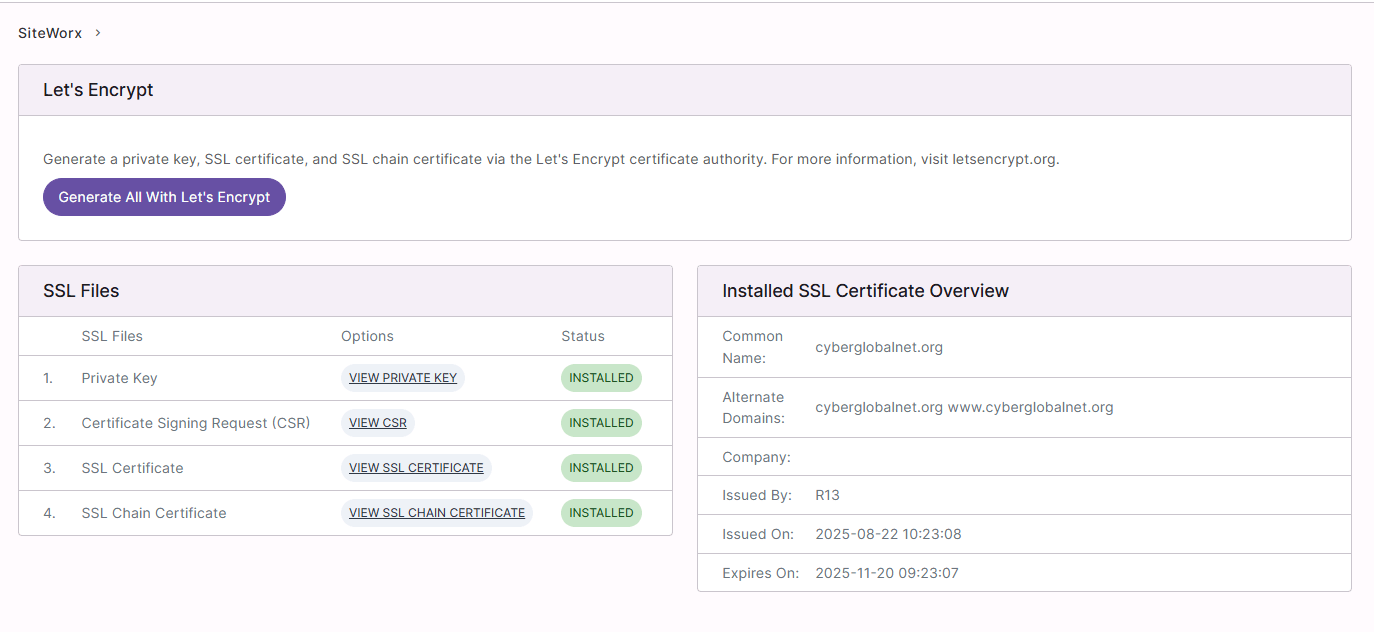
Step 5 – Confirm Installation
Once installed, you will see the generated files (private key, CSR, SSL certificate) and the certificate details in the status section.
Recommendations
-
The free Let’s Encrypt SSL certificate is valid for 90 days. SiteWorx usually renews it automatically.
-
Verify that your site loads correctly with https://.
-
Make sure to redirect all visits from http:// to https:// for better security.
 Español