To configure your email on your Android device, follow these steps:
1.- On your phone, go to Settings -> Accounts -> Add an account -> Personal (IMAP):

2.- Once you have clicked on Personal (IMAP), this window will appear, enter your email and click on next:
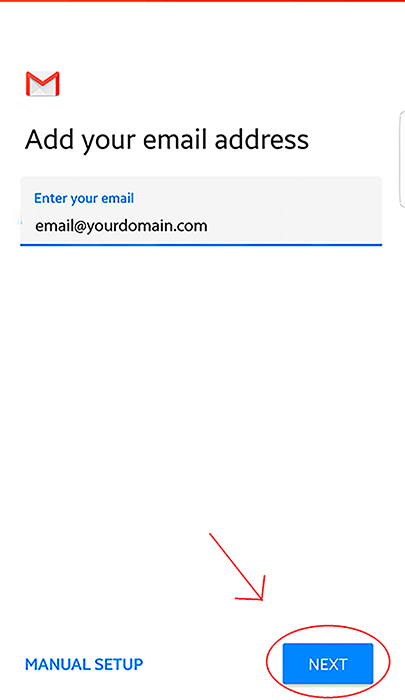
3.- Once you have clicked next, you will be taken to this window, enter the password of your email and click next:
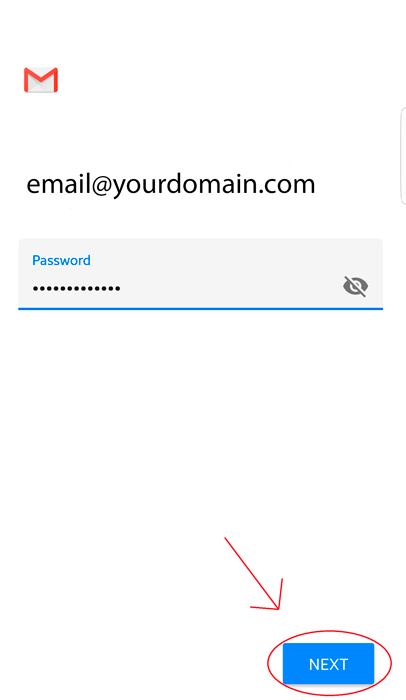
4.- This window will appear, be sure to enter "mail." before yourdomain.com as seen in the image below, and then click on next:
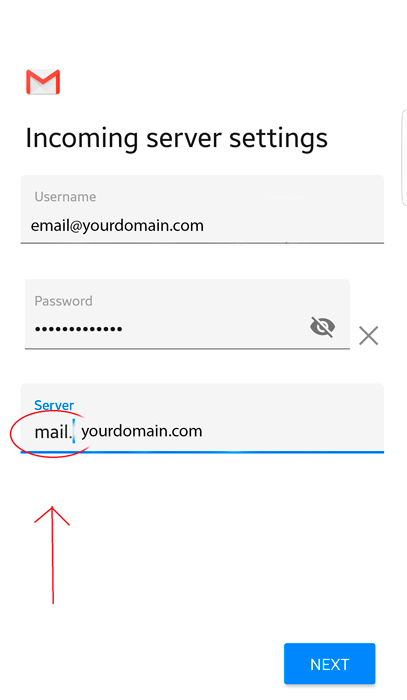
5.- Another window will appear, in this case you must do the same as in the previous step, entering "mail." before yourdomain.com, then click on next:
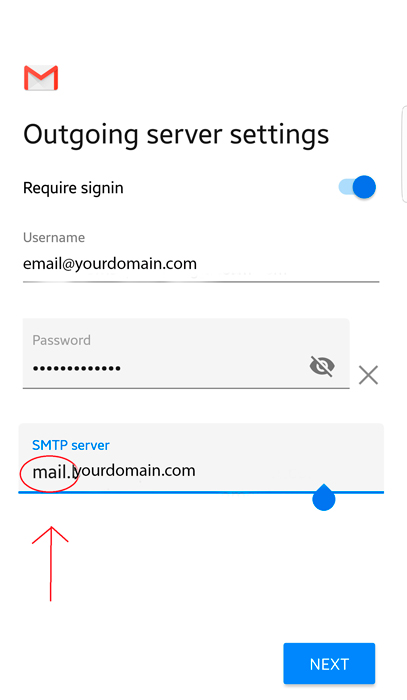
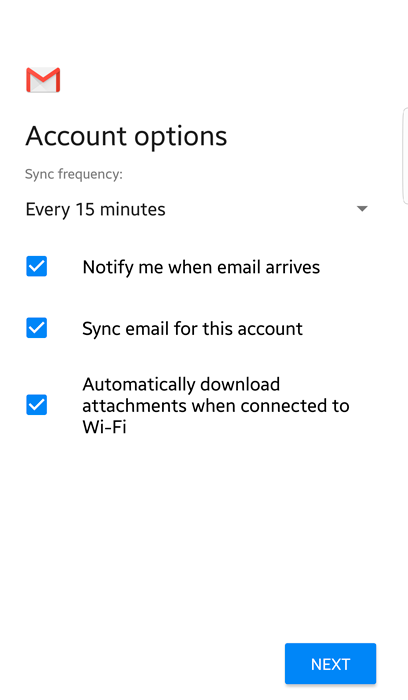
6.- Now you will see this window, we recommend leaving everything marked so that the email is always synchronized:
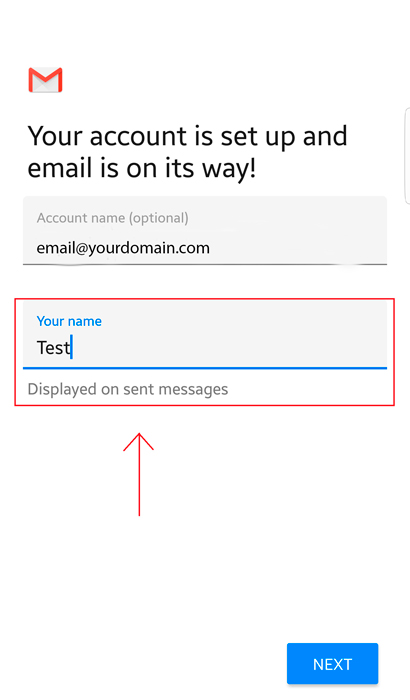
7.- Now you can choose the name you want to appear in the emails sent, once you have done that, click next:
8.- Congratulations! You have just finished configuring your email. To be able to see your emails, look for this icon among all your applications:


 Español