Wordpress
-
1. How to log in to your WordPress dashboard
To login into your WordPress website, follow these steps:
1. First, on your browser, open the home page of your website

2. Then we go to the address bar and after the domain of your website, add /wp-admin

3. Finally, input your credentials and click Log in

You are now ready to manage and edit your WordPress site. In the next tutorials, we will see how to create, edit, and remove content from your website.

-
2. How to start editing a page in Elementor
To start editing a page in Elementor, follow these steps:
1. First, once in your administrator dashboard, click on the section named Pages

2. Select the page you want to edit

3. Finally, press the Edit with Elementor button

You are now ready to edit your page

-
3. How to create a page on WordPress
To create a page on WordPress, follow these steps:
1. First, once you have logged in to your administrator dashboard, click on the section named Pages

2.Click the Add new button

3. Write the title and edit the content

4. On the box located on the right side of the page, click on Publish

You successfully created a page on WordPress
-
4. How to delete a page on WordPress
To delete a page on WordPress, follow these steps:
1. Log in to your WordPress dashboard, and click on the section named Pages

2. Click Trash on the page you want to delete

You successfully deleted a page on WordPress.
-
5. How to edit Elementor Content
To edit content on Elementor, follow these steps:
1. First, you have to go to the page you wish to edit

2. Click on Edit with Elementor button

3. Once in the editor page, click on the pencil button of the element you want to edit

4. On the left side of the page you will see an editor box where you can edit the content of the element selected

You will be able to do the same on every element.
-
6. How to create Elementor content
To create content on Elementor, follow these steps:
1. In the Elementor editor, go to the bottom of the page and click the + button

2. Choose the layout that you want

3. On the right panel, click on the 9-doted button

4. Drag and drop the element you want to create

5. Don't forget to update the changes with the Update button located in the bottom right

-
7. How to delete Elementor content
Delete a section
Go to the section you want to delete, hover the mouse pointer and click the x button

Delete an element
1. Go to the element you want to delete, hover the mouse and right-click the pencil button

2. On the floating menu, click on Delete

You have successfully deleted the Element.
-
8. How to create a post on WordPress
To create a post on WordPress, follow these steps:
1. In the WordPress administrator dashboard, on the right panel, click the Posts section

2. Once there, press Add new button

3. Input the title and the content of the post

4. Click the Publish button on the upper right to save and publish your post

-
9. How to edit a post on WordPress
To edit a post on WordPress, follow these steps:
1. First, you have to go to the Posts section of your administrator dashboard

2. On the posts list, click the Edit button at the post you want to edit

3. Once in the editor page, you can change the content of your post

4. Press the Update button in the top right to save your changes

-
10. How to delete a post on WordPress
To delete a post on WordPress, follow these steps:
1. First, you have to go to the Posts section of your administrator dashboard

2. On the posts list, click the trash button on the post you want to delete

You successfully deleted a post on WordPress.
-
11. How to create a post category on WordPress
To create a post category on WordPress, follow these steps:
1. On the WordPress administrator dashboard, on the left panel, click the Categories section located under the Posts menu

2. Once there, write the name of the category

3. Click the Add new Category button

You successfully created a post category.
-
12. How to edit a post category on WordPress
To edit a post category on WordPress, follow these steps:
1. On your WordPress administrator dashboard, on the left panel, click the Categories section located under the Posts menu

2. Once there, choose a category you want to edit and click Quick edit

3. Once there, you can edit the category name and slug. Note that the slug is always in lower case.

4. To save, click in the Update Category button

You successfully edited a post category.
-
13. How to delete a post category on WordPress
To delete a post category on WordPress, follow these steps:
1. On your WordPress administrator dashboard, on the left panel, click the Categories section located under the Posts menu

2. Once there, choose a category you want to delete and click Delete

You successfully deleted a post category.
-
14. How to edit slider with Slider Revolution
To edit your website slider on WordPress with Slider Revolution, follow these steps:
1. On your WordPress administrator dashboard, on the left panel, click the Revolution Slider section

2. Once there, select the slider you want to edit

3. Once in the slider editor, you can switch between slides with the button on the top

4. To change the image of a slider, you have to click the images button located at the top right

5. Then you click on background settings in the right panel and click the image button to select a new image

6. To edit the content, you must select the layer you want to edit

7. On the right panel, you will be able to edit the content. Click the Save button to update the changes

-
15. How to create Forms using FluentForms
To create a form using FluentForms, follow these steps:
1. In the WordPress dashboard, select "FluentForms" from the side menu and click New Form.

2. Select a predesigned template or choose Blank Form.

3. Give your form a name.

4. Drag and drop fields from the Fields section to the form design area.
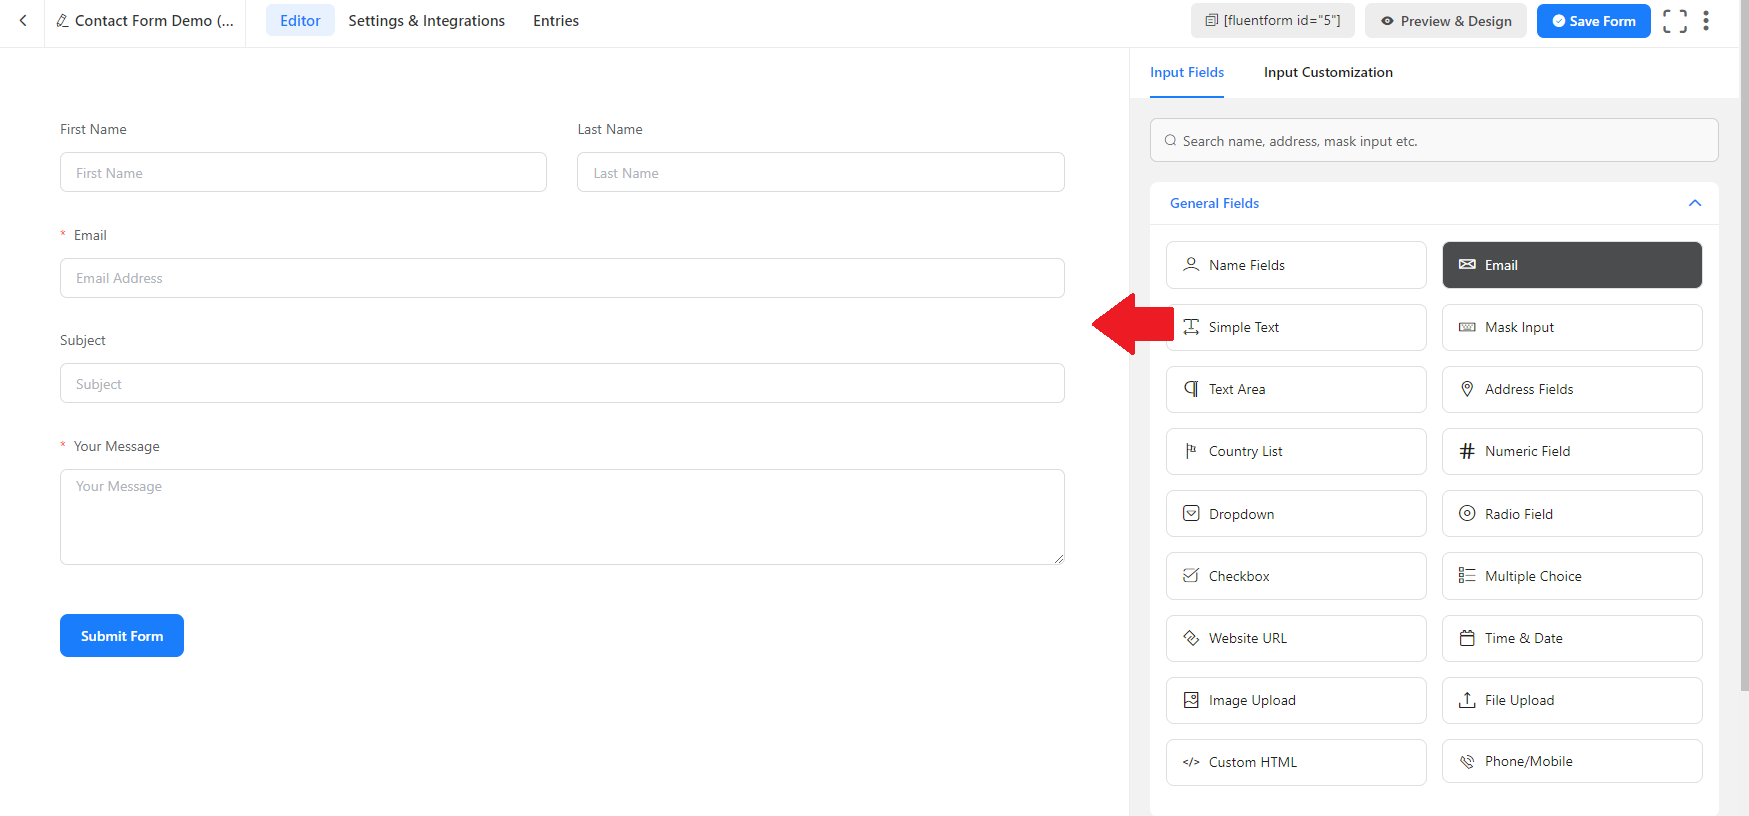
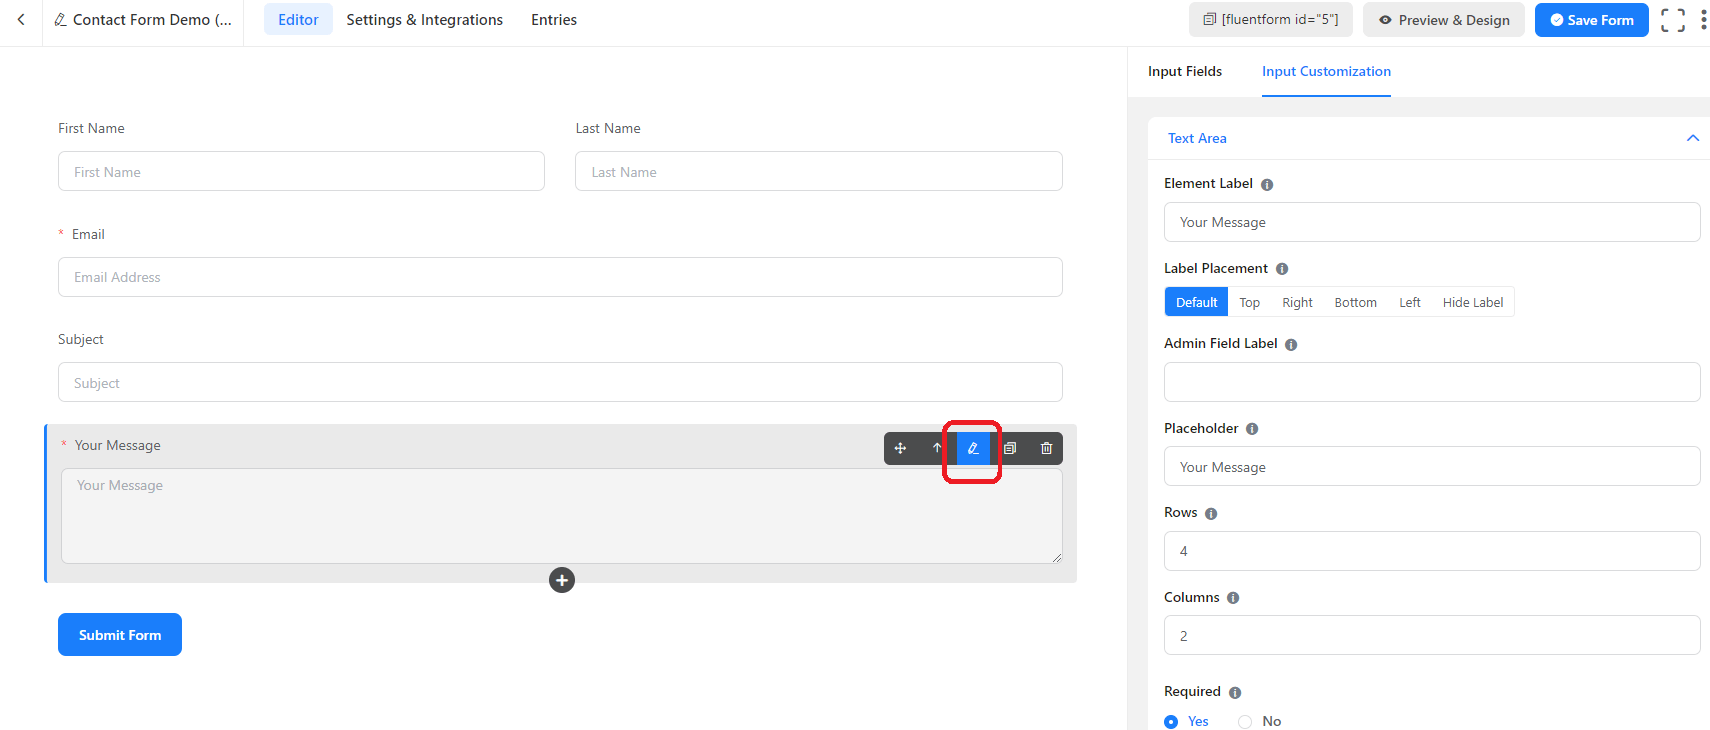
5. You can customize each field by clicking on it.
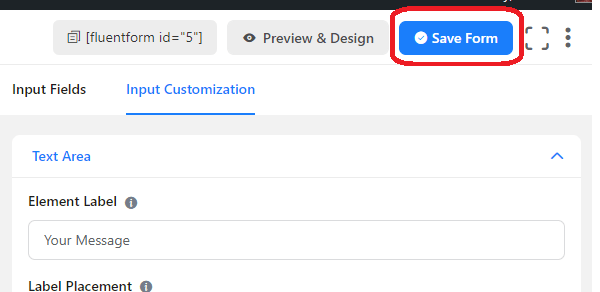
6. Once you have finished designing your form, click on "Save" in the upper right corner of the Fields section.
A form has been successfully created
-
16. How to Publish a Form created in FluentForms
There are two ways to publish a form in FluentForms, follow the steps below:
Using a shortcode
1. Copy the shortcode of the form.

2. Paste the shortcode into the page or post where you want the form to appear.

Using the FluentForms block
1. Find the FluentForms block in the WordPress block editor.

2. Select the block and insert it into the page or post where you want the form to appear.

3. In the block, select the form you want to display.

A form has been published successfully
-
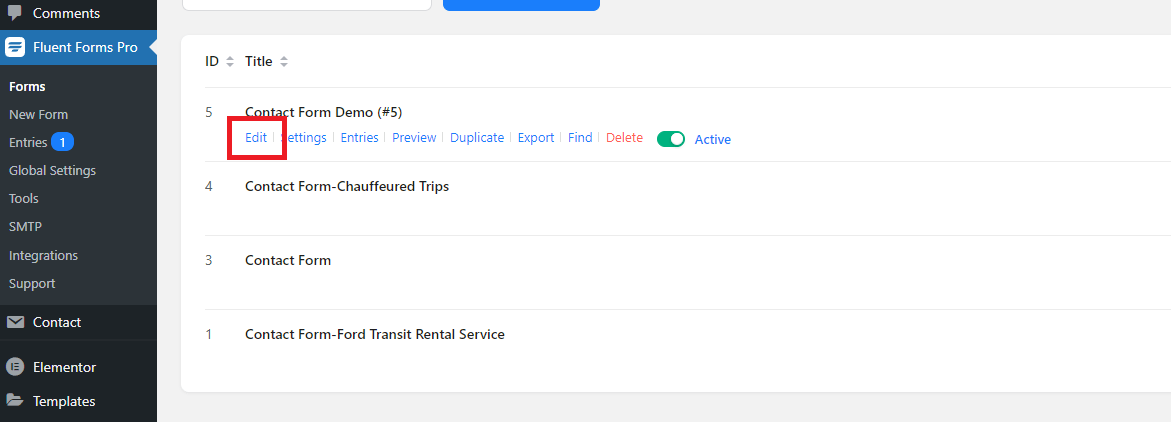
17. How to Edit a Form in FluentForms
To edit a form in FluentForms, follow the steps below:
1. In the WordPress dashboard, go to FluentForms.
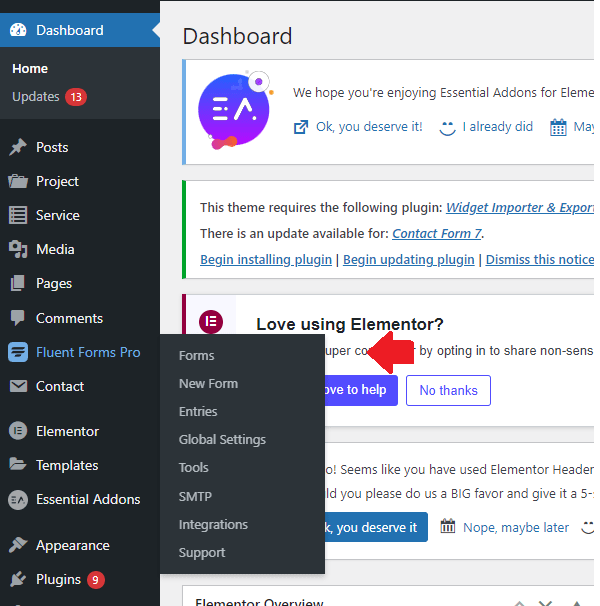
2. Find the form you want to edit and click on the form name or the Edit button.
-
18. How to add e-mail notifications when filling out a form.
To add e-mail notifications, follow the steps below:
1. In the WordPress dashboard, go to FluentForms.

2. Look at the form where you want to add notifications, hover over it and click on "settings".

3. In the gray column on the left, go to "Email Notifications".

4. Click on "Add Notification".

5. In the "Send to" field select "Enter email".

6. Enter the recipient's email address

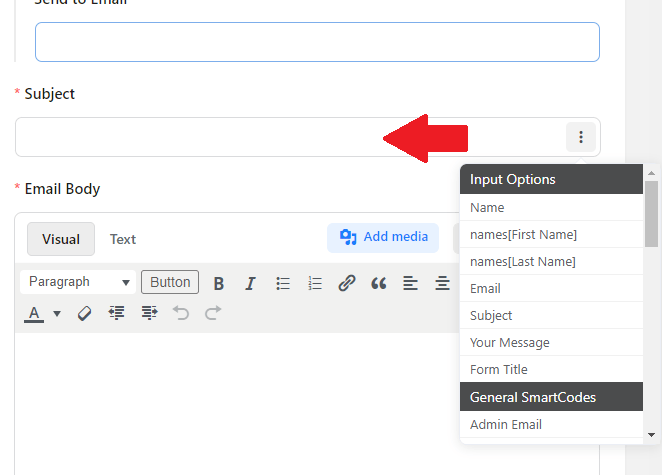
7. In the Subject section, enter the email subject.
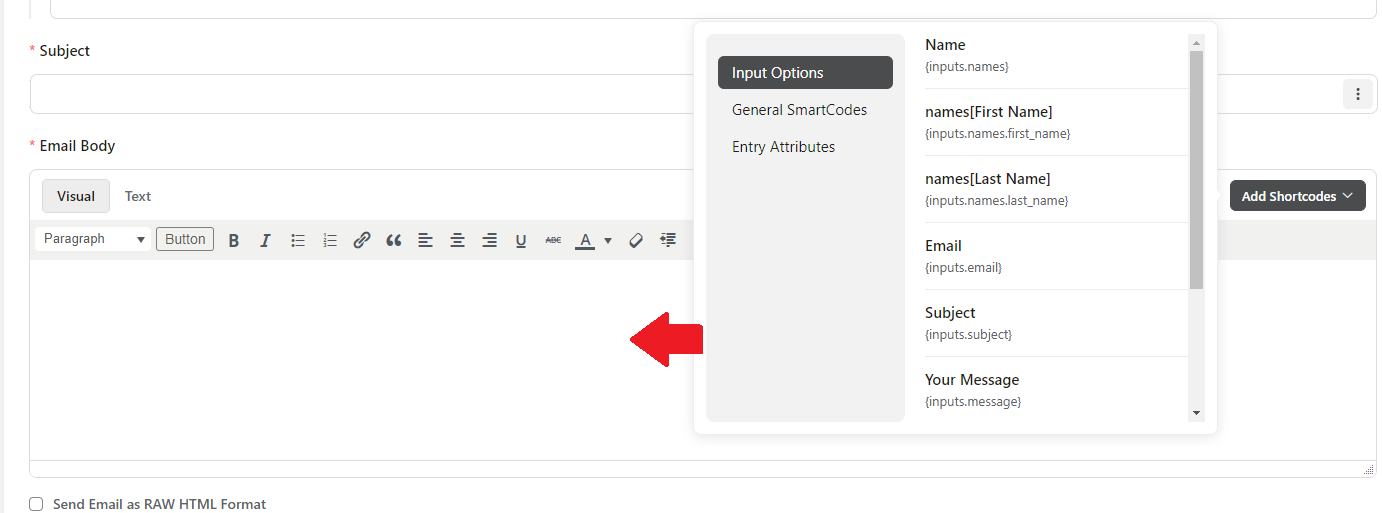
8. In the Message section, enter the body of the email. You can use dynamic tags to include information from the form in the e-mail.
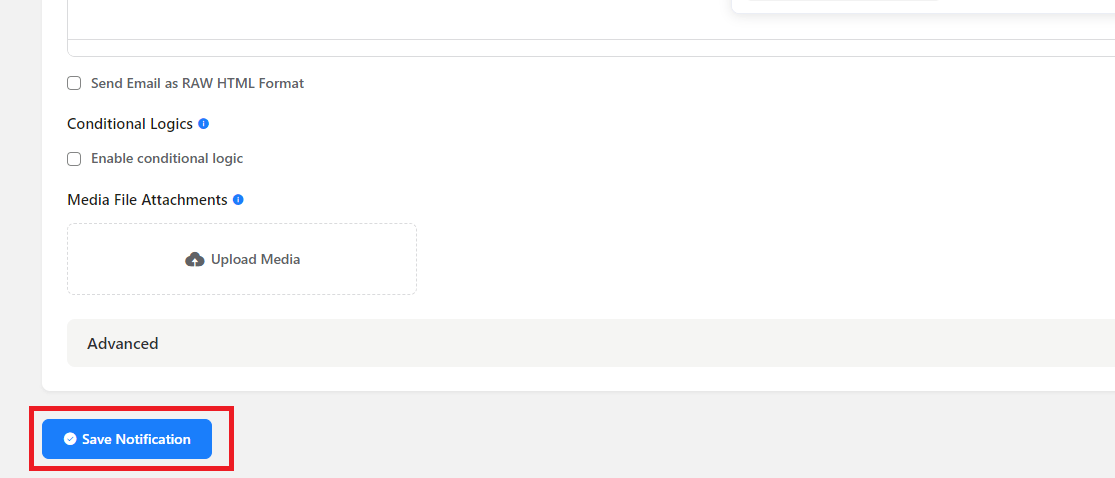
9. Click the Save button.
-
19. How to delete a field in FluentForms.
To delete a field in FluentForms, follow the steps below:
1. In the WordPress dashboard, go to FluentForms.

2. Find the form you want to edit and hover over it and click "edit".

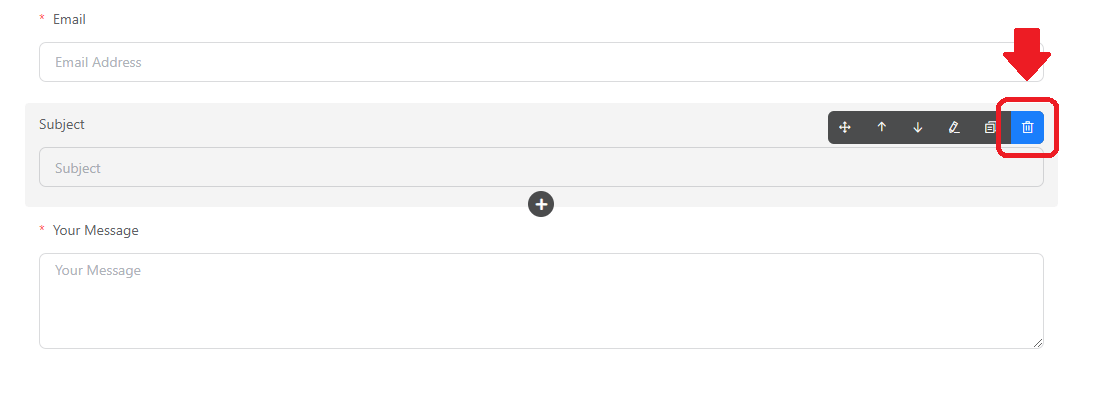
3. Locate the field you want to delete and click the "delete" button on the right side of the field.
-
20. How to add a field in FluentForms.
To add a field in FluentForms, follow the steps below:
1. In the WordPress dashboard, go to FluentForms.

2. Find the form you want to edit and hover over it and click on "edit".

3. In the left panel of the form editor, find the "fields" section.

4. Click on the field you want to add.

5. Drag the field from the left pane and drop it in the design area of the form.

-
21. How to delete a form in FluentForms.
To delete a form in FluentForms, follow the steps below:
1. In the WordPress dashboard, go to FluentForms.

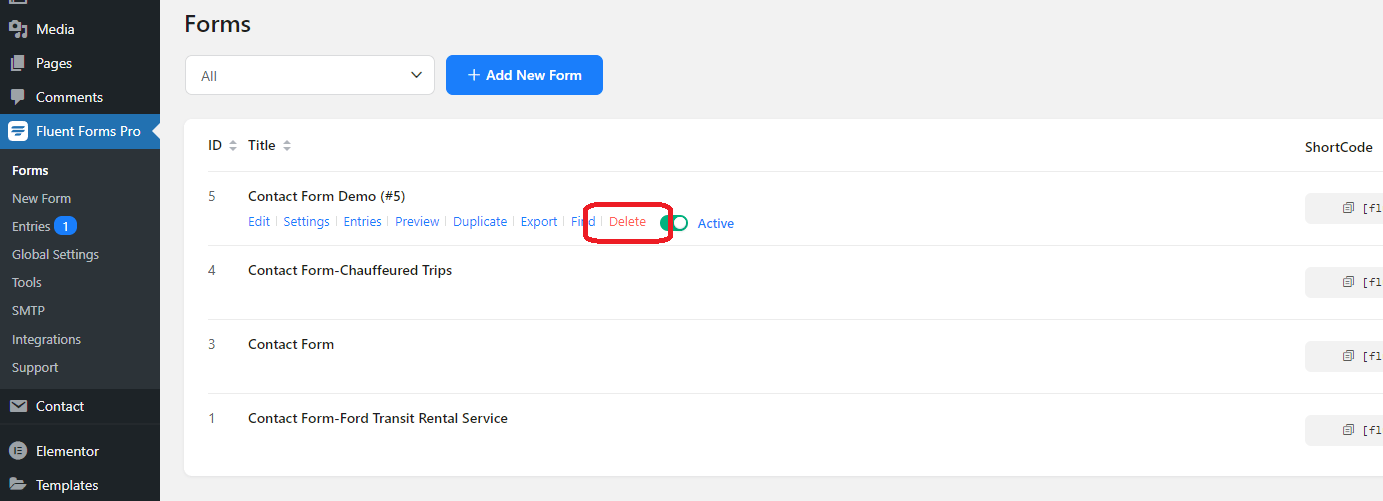
2. Find the form you want to delete and hover over it and click "delete".
-
22. How to use conditional fields in FluentForms
To use conditional fields in FluentForms, follow the steps below:
1. In the WordPress dashboard, go to FluentForms.

2. Find the form you want to edit and hover over it and click on "edit".

3. Select the field you want to make conditional.

4. Click on the "Advanced Options" option.

5. Check the Enable conditional logic checkbox.

6. Define the condition

-
23. How to Add or Change Before/After Images in WordPress?
-
Go to the page where the Before/After block you want to edit is located.
-
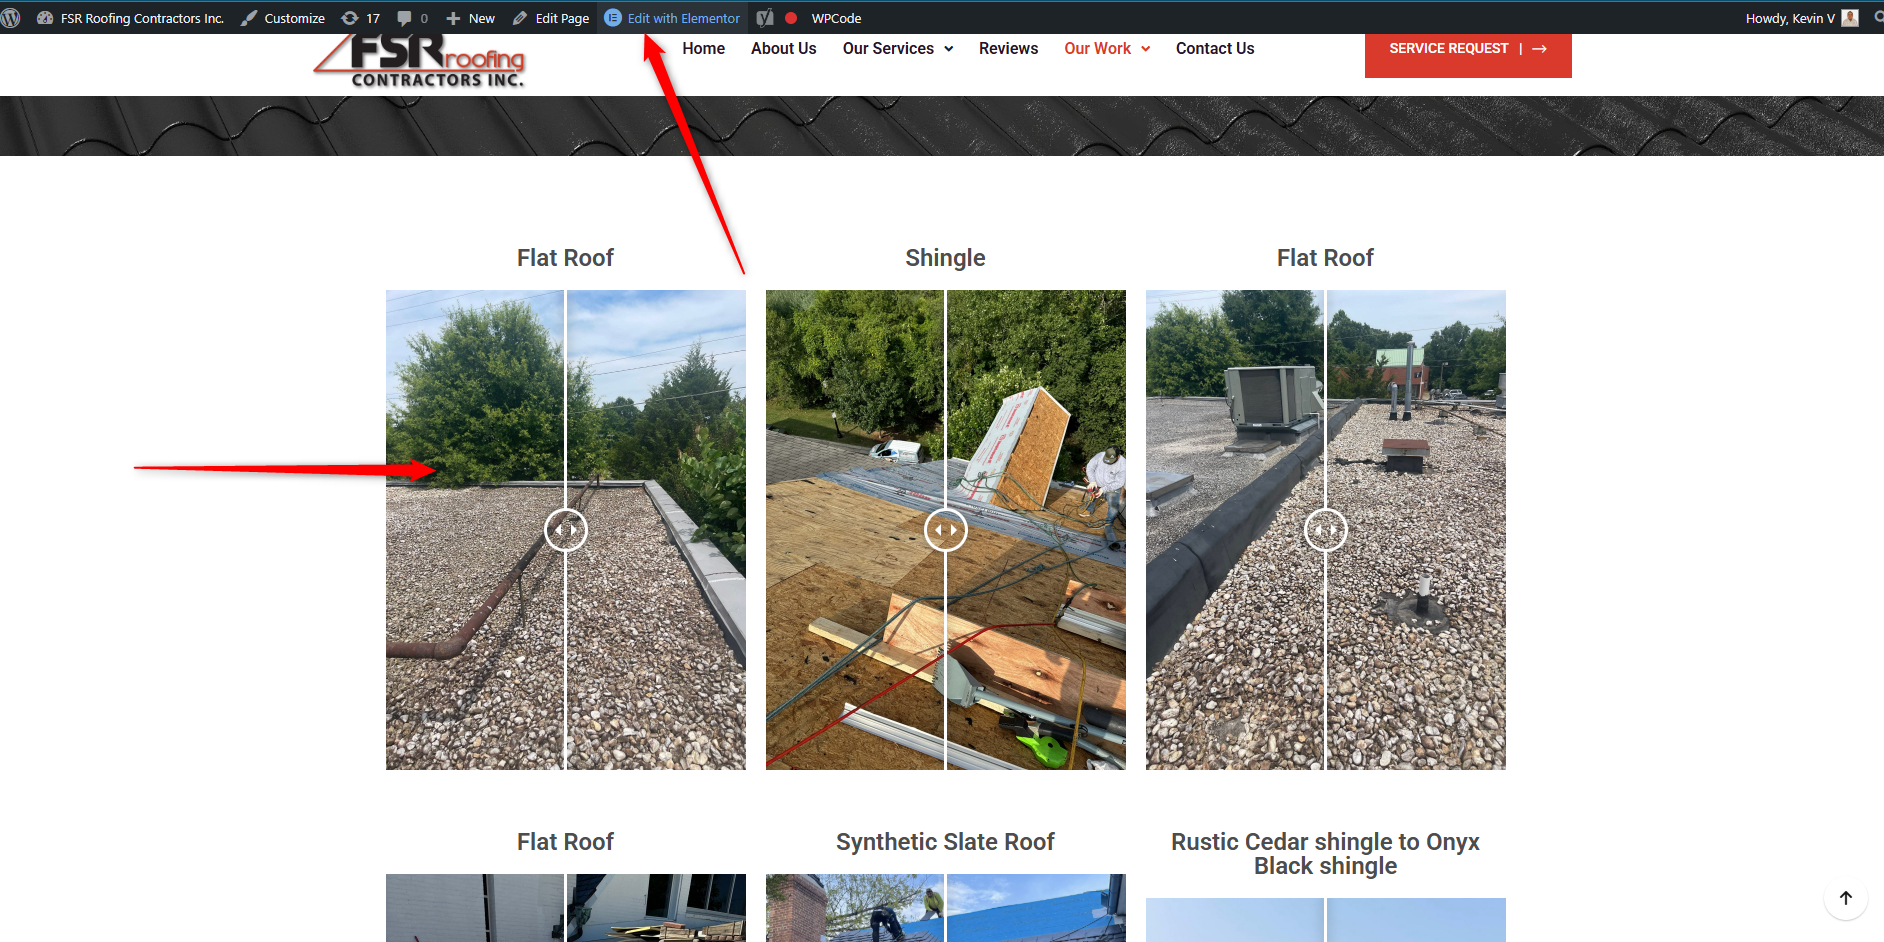
Open Elementor by clicking the Edit with Elementor button in the top menu.
-
Select the Before/After block you want to modify by clicking on it.
- To add a new Before/After, you must search for the module in the right panel. In the search engine you can enter the word before and drag the module called Twenty20 Before-After to the place where you want to add it.
- To modify the Before/After. Select the Before/After block you want to modify by clicking on it.
-
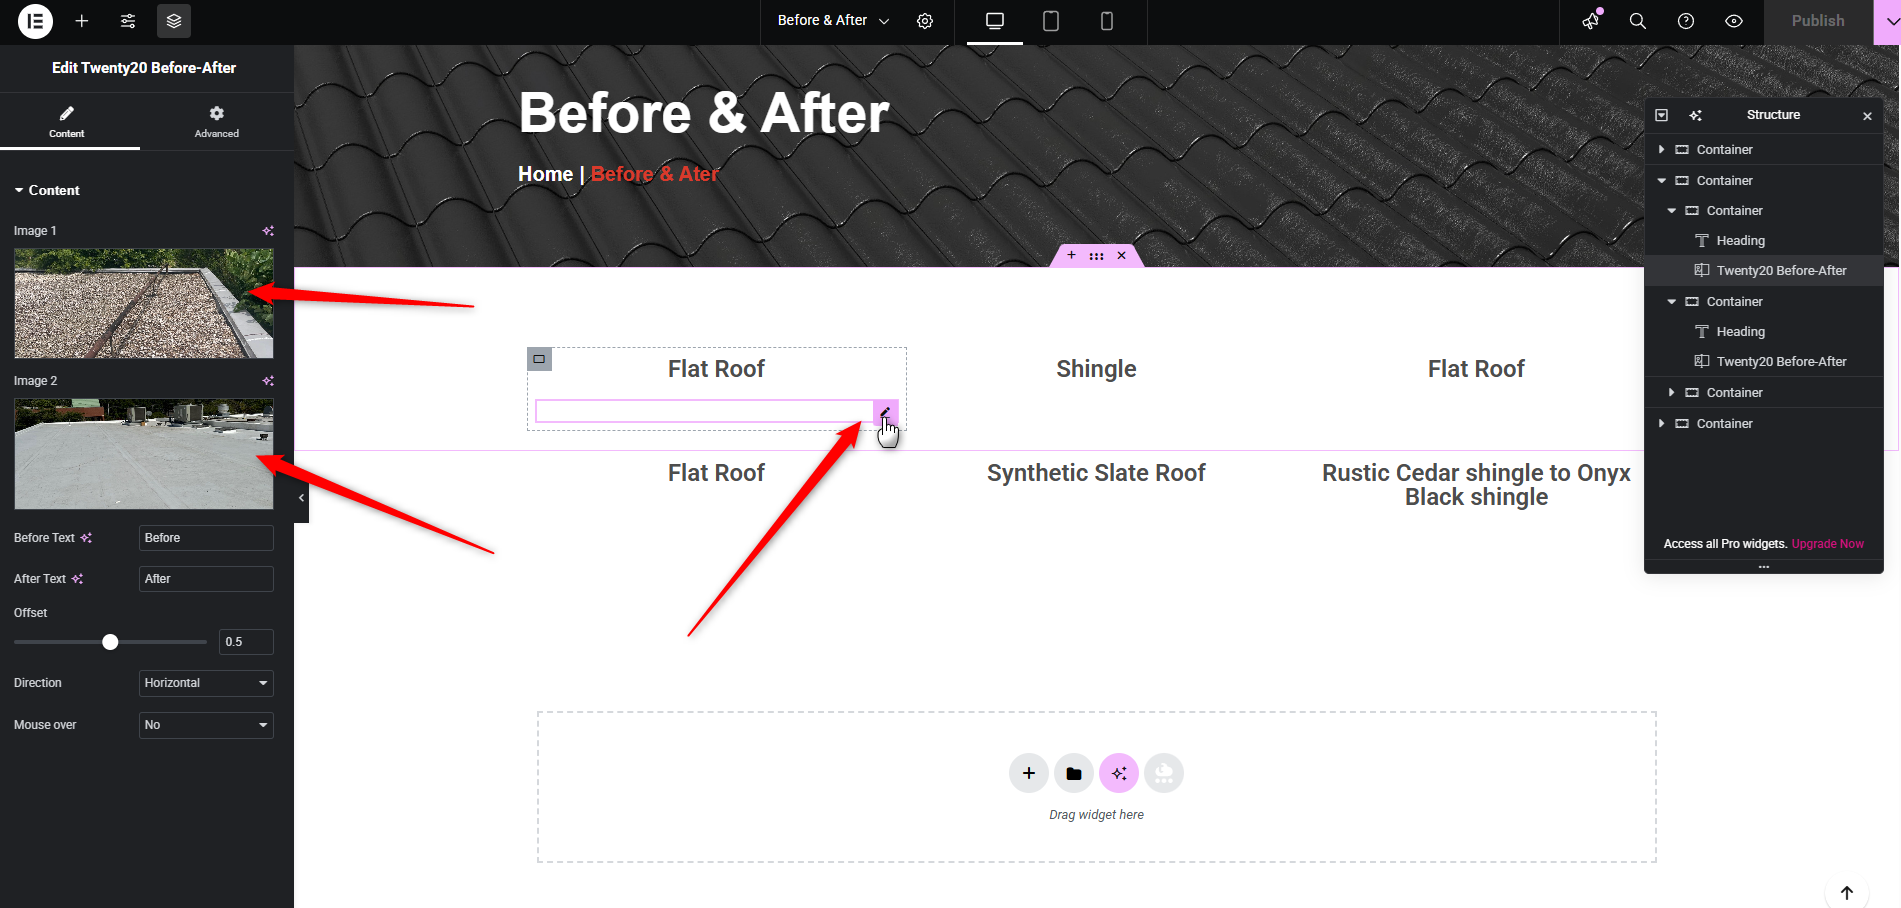
In the left panel, you will see the Before/After settings.
-
Upload or choose the images you want to display: one for the “Before” and one for the “After.”
-
Once you’re done, save your changes by clicking the Publish (or Update) button in the top-right corner.
-


 Español